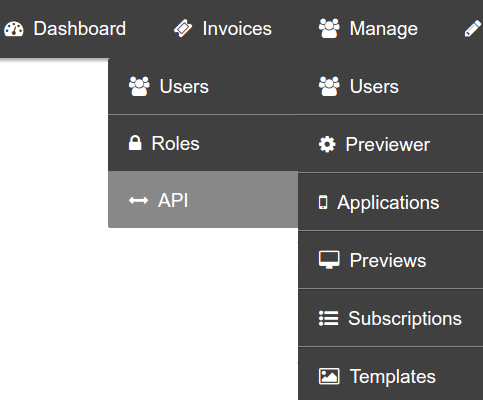
- Backoffice’s functions
- Dashboard
- Manage > Editor access > Users
- Manage > Editor access > Roles
- Manage > Backoffice access > Accounts
- Manage > Backoffice access > API
- Manage > Applications
- Manage > Templates
- Sales > Invoices (Platform Edition)
- Sales > Subscriptions (Platform Edition)
- Appearance > General
- Appearance > Previews
- Settings > General
- Settings > Modules
- Settings > APIs
- Settings > Push
- Settings > Sales (Platform Edition)
- Settings > Advanced > Cron
- Settings > Advanced > Modules
- Settings > Advanced > Whitelabels (Platform Edition)
- Settings > Advanced > Configuration
- Settings > Communication
- Settings > Translations
- Editor’s functions
- Menus when you are managing an application
- General menus
Backoffice functions:
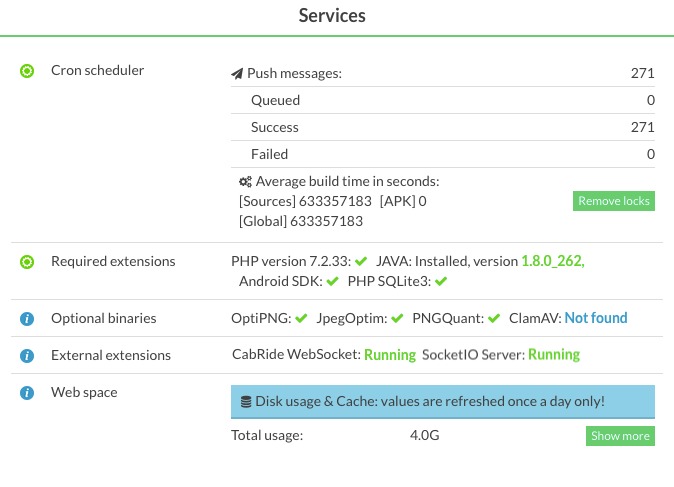
Cron scheduler:
Many tasks in Siberian are done thanks to a cron job. A cron job is something you can see as an automating task. In our system the file named cron.php, which is at the root of the Siberian folder, has to be called every minute by a cron job to perform some tasks (sending the push notifications, creating the zip file of the source code of the app, generating the APKs).
If this cron job is not set in your Siberian you will not be able to perform these tasks, and they will stay in queue.

(Note that in the SAE, the cron job is disabled by default and you can download the source code of the app thanks to another system, but you will not be able to send push notifications and other tasks may not work correctly unless you active it)
-
- from your dashboard you can see:
if your cron job is set up correctly. If not you have to install it correctly. Click here to know how. - some feedbacks about your push notifications, and the average time taken by your server to build the zip file of the app’s source code or the APK.
- from your dashboard you can see:
Required extensions:
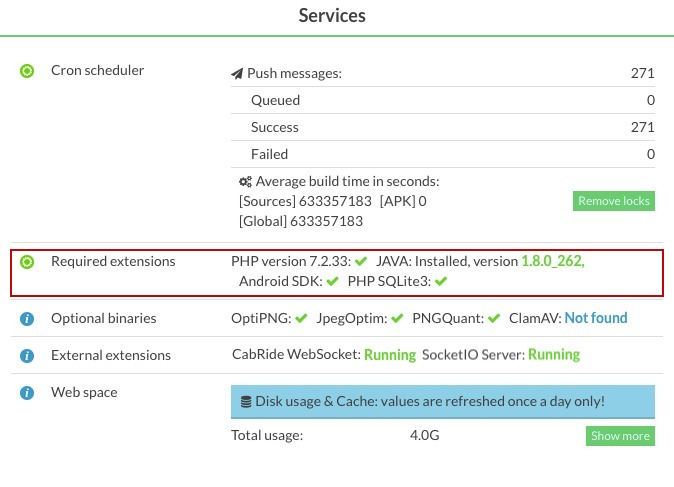
It answers to these questions: Are you using the correct PHP version ? Are Java and the Android SDK installed on your server (only for commercial editions to build the APK automatically) ? Does the PHP SQLite 3 is loaded (to generate the analytics) ?
Optional libraries:
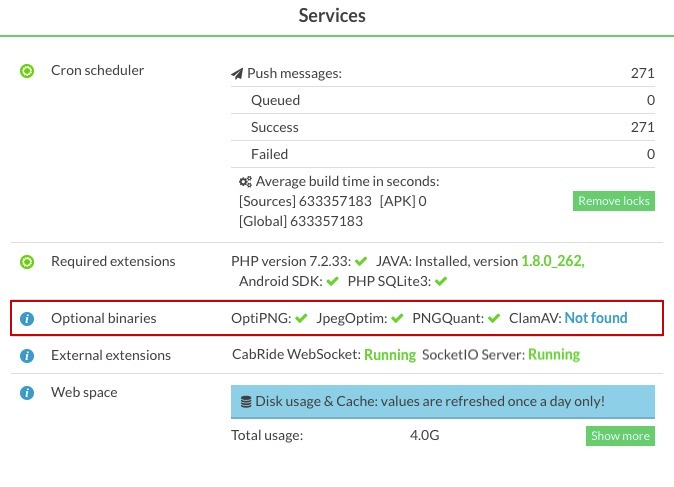
These optional libraries are useful if you want to lower the size of the images that are used by your app, and thus to lower the size of your APK and IPA files. Check here how to install them.
You will find also how to install ClamAV antivirus (optional) here.
External extensions:

If you have installed some features like CabRide or RealTime Chat, you need to have the CabRide Websocket and SocketIO server running to make these modules work.
Web space, disk space and usage:
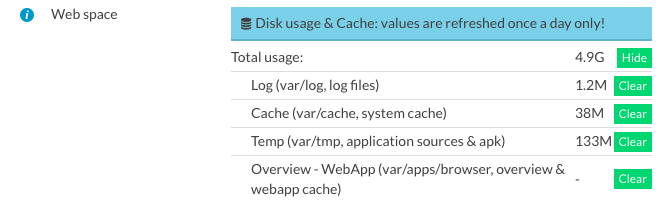
Here you can clear all, it has absolutely no impact on the functioning of Siberian CMS:
- “Log” is the folder which contains the error log files that are generated when there is an error in your system. You can clear that unless you have some errors and you want to use the logs to resolve them.
- “Cache” is the folder in which some files of your Siberian are stored to speed up your Siberian (the files are not regenerated, the stored files are used). If you have some weird displays in your Siberian (for example, white text color while you haven’t chosen white for text color), you can click on clear. Don’t clear the cache too much because it has to be regenerated each time it is clear and that would slow down your CMS.
- “Temp” is a folder in which are stored temporary files (files that you will use at a specific moment and that can be generated again), like the APKs that are generated, the zip file of the app source code. You can clear the folder to remove all the files and gain some disk space if needed.
From this menu you can get the list of all the invoices generated by your platform when a client pay you. They are made automatically when payments and subscriptions are charged.
List of your users (the app administrators), you can:
- edit a user account
- connect as this user in your editor
- turn a user account off
- delete a user account

Edition of a user:
As a beginning you can check these 2 articles, that may help you to understand the following information: “Publication Access Type” and “App Access Management”
- Publication access type:” you can choose if this user will be able to:
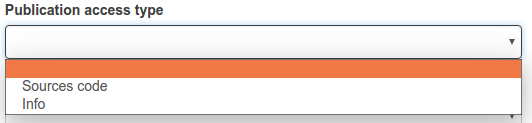
- Download the source code of an app from the editor in the Publication section
- The publication access type of an Application is determined by the publication type settings that are set for its Creator.
For instance Account A creates an app, all other accounts tied to this app, will have the publication type settings of the Account A. - Or, to not access to the source code of his app from the Publication section of the editor but to send you his information. If you choose this option the user will get several fields to fill in, and a button “Publish my app”. He will have to click on this button to get his app published. If he clicks on this button, here is what will happen:
- if you are using a SAE, or a MAE: as a Siberian admin you will receive an email to inform you this user wants this app to be published and you will have to publish his app.
- if you are using a PE: the user will be sent to the payment process from which he will be able to choose from the pricing plans you have created. After the user payment, you will receive an email to inform you that a user has paid to get his app published and you will have to publish his app.
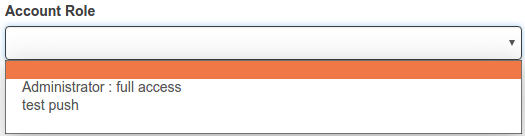
- Account role:” from here you can give a specific role to this user. The roles which are listed are the one you have created in the menu Manage > Users > Roles
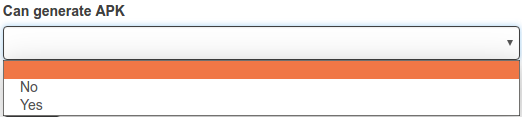
- Can generate APK:” choose if the user can generate the APK files of his Android apps from the editor in the Publication section. If you choose yes, the user will be able to generate the APK of his app whenever he wants.
Manage access section:
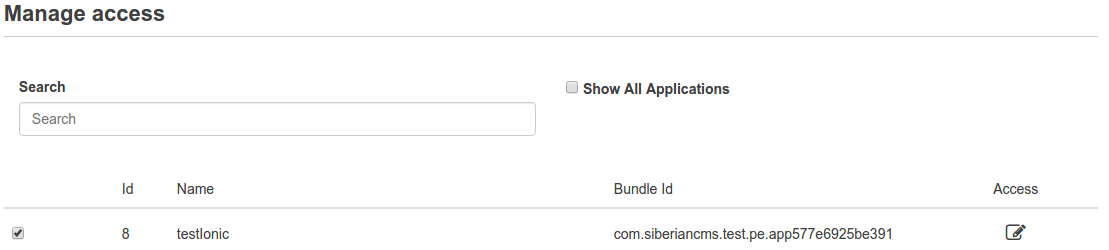
- from this section of the user edition you can choose which app(s) this user can access to. To get the complete list of the apps created in your Siberian, click on “Show all applications”
- Click on the edit icon on the right of each application to enter the advanced access management:
- from here you can choose:
- if a user can access or not to a specific page of an app: just uncheck a page in the “Allowed” column to disable the app admin to manage this page in the editor
- if a user can add pages to his application or not: if you uncheck, the user will not able to add new pages to the application in the editor.
- from here you can choose:
From here you can list the roles that you have created in your Siberian. You can check this article with video to better understand. A role is what can do or not an app admin in the editor: you can choose to create a role to not authorize an app admin to access some specific menus of your editor, and/or to not access to some features.
When you create a new role you can set this role as the default role of your Siberian. That means all new users that are registered to create or manage apps in your Siberian will have this role. This can be useful if you want to limitate a new user of your CMS automatically.
If you have already registered users in another system and you want these users to use their existing account to access the editor of your Siberian, you may use our API for that. These users will be listed here.
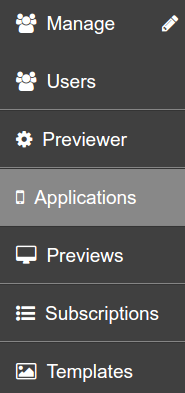
From here you can see the list of all the apps that are created in your Siberian. If you are using a PE you can click on “Show the applications waiting for publication only.” to see the applications that have been paid and that needs to be published.
You can check this article to have a better understanding of this menu.
Click on the edit icon on the right of the list to edit an app:
![]()
General Information:
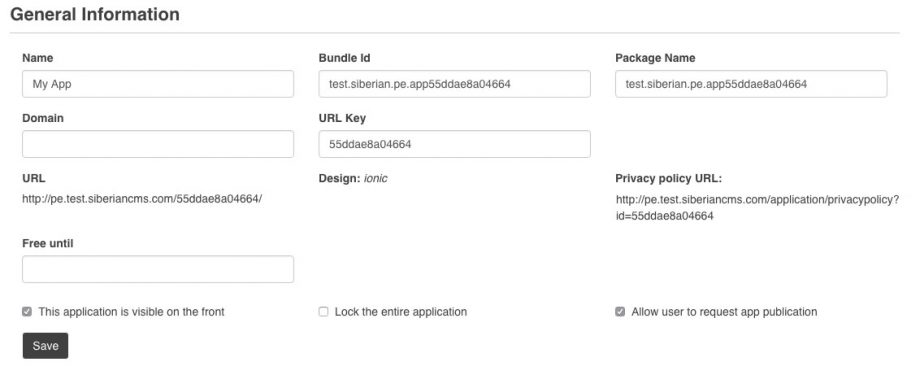
- Name:” the app name
- Bundle ID:” the string of characters that is the unique identifier of your app for Apple. If you publish an application with a specific bundle ID, this ID will be the same all along your app life, it cannot be changed.
- Package name: “the string of characters that is the unique identifier of your app for Google. If you publish an application with a specific Package Name, this ID will be the same all along your app life, it cannot be changed.
- Domain:” That’s the same field than in the editor in the Settings > Domain section. If you want to apply a custom domain to an app, you can do that from here instead of the editor.
- URL key:” that’s the random key which is used to create the default domain/URL for an app. You can change the URL key here to get a more custom domain/URL without the hassle to create a specific custom domain name. For example, you may prefer your-siberian-domain.com/pizza-roma, for a restaurant named Pizza Roma, rather than your-siberian-domain.com/5788E7E77Ehf
Warning:“ if you change the domain of the app, whereas you choose a custom domain or a specific URL key, after an app has been published, the app will not open anymore because it had been published with another domain/URL and it will not be able to retrieve its content as his domain doesn’t exist anymore in your Siberian. - Privacy policy URL:” the URL of the app’s Private policy, to be used for the publication of the app on the Google Play Store
- Free Until (only for a PE):” if the app has a free period, the limit date will be displayed here. You can remove it and save to remove a free period limit. If the free period is expired, there will be two consequences for the application:
- the app will have its content locked: the app will open on a page that will explain the content is locked
- the app admin will not be able to edit the app anymore and will be sent to the payment process. If he pays, the application will be unlocked and he will be able to manage his application.
- “This application is visible on the front”:” if unchecked the application will not be listed anymore in the dashboard of the app admins who have access to this application.
- “Lock the entire application”:” if checked it will completely lock the application and the app will open on a page that will explain the content is locked. It is automatically checked in the case the application has a free limit period and the free period is over (see above).
- “Allow user to request app publication:”” if uncheck the button “Ready? Publish my app!” in the Publication section of the editor will not be displayed.
Device Information:
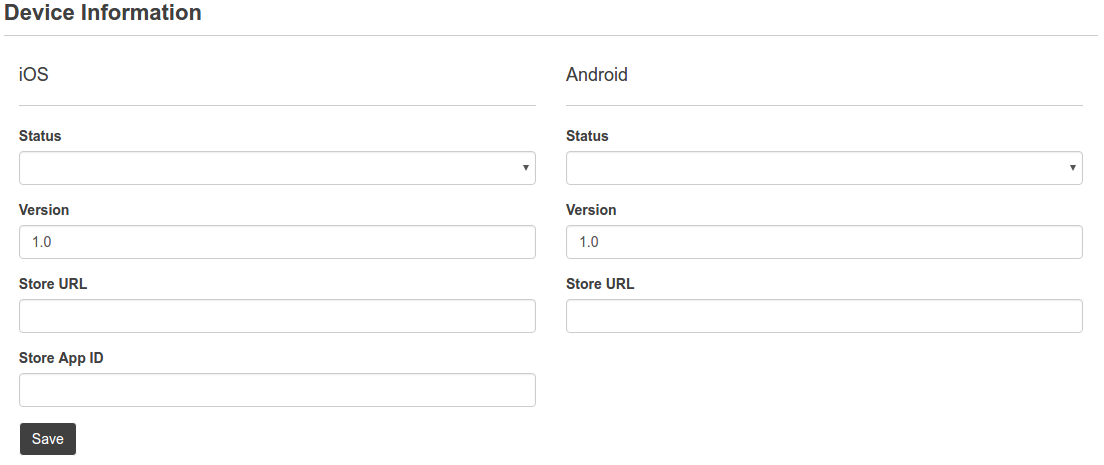
- Status:” you can choose a status for an app. Note that you need to choose “Published” if you want to be able to send push notifications on this app, even for testing purpose. In the PE, if you choose “Published” for both iOS and Android, the app will not be listed anymore when you check “Show applications waiting for publication only.”
- Version:” an app must be published with a version number. And if you want to publish an update of your app, you will have to change the version number for a higher one before compiling your application.- Note that there are two different things when we talk about “updating an app”: you can update the content of an app (adding a news, a discount code, an existing feature, the colors, etc), and you can update your application on the stores because you need to republish it. In the first case, most of the time, you don’t need to update your app on the store and thus you don’t need to recompile it. Just change the content, or add the new feature, change the colors, and restart your app on your phone to see the changes. But, if you change some other things that are native to the application like its startup images, its icon or its name, you will have to compile a new version of your app and republish it. In that case you will have to increase the version number before recompiling your app.
- Store URL:” in these fields you can enter the URL to the stores to download the application. That’s the same fields than in the editor in the “Promote” menu.
- Store app ID:” it’s the ID of your app in the App Store.
Stores info:
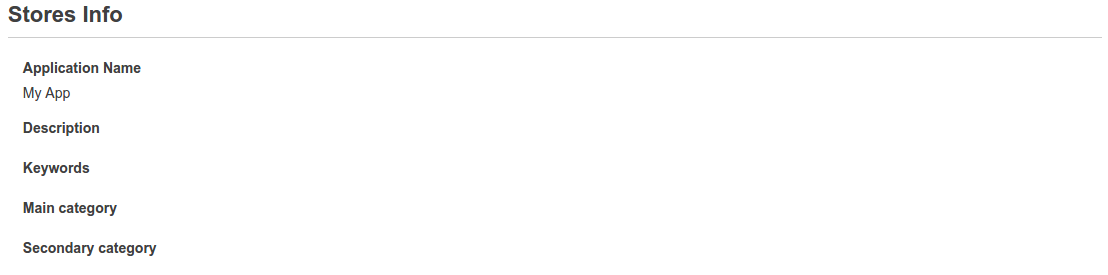
Here you will find all the information that have been filled by the user (app admin) in the Publication section of the editor if this user has had to fill in the info fields (aka if you have chosen “Info” for “Publication access type” and not “Source code”).
Advertising:
If you want the app uses your AdMob banners you can check this (AdMob is explained in the Settings > General menu of the backoffice)

Banner settings:
Here you can create a promote banner for your application. This will create a code to insert on your site. You will find this code in your app editor, in the “Promote” menu.

Developer accounts:
Here you will find the developer accounts info that have been filled by the user (app admin) in the Publication section of the editor if this user has had to fill in the info fields (aka if you have chosen “Info” for “Publication access type” and not “Source code”). You will need these accounts to publish the app of this user (to connect to the user’s account on the stores)
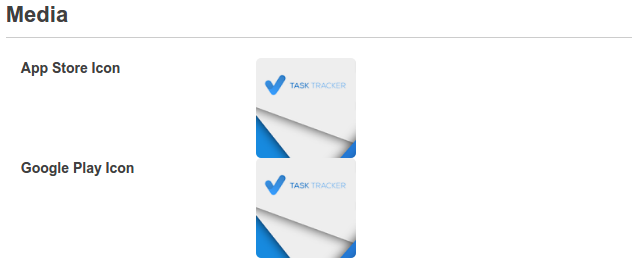
Media:
Just the app icon for Google and Apple. Right click on it to download it.
Mobile Source Codes & Builds:

To install it on a device and/or upload it to the stores, an application must be generated.
Even the final application is always generated from its source code, there are two options to generate your app:
- generating the app manually“: you have to download the source code and generate the app from the appropriated software (Xcode for iOS, Android Studio for Android)
- generating the app automatically“: for Android thanks to the APK Generator if you have a MAE or a PE, and for iOS thanks to the iOS Auto-Publish module if you buy a license for this module.
Sources:
If you want to generate your app manually you can download the source code of your app from here. Just click on “Generate source” to launch the process of creating the source code of your app. Once it is made, a few seconds or 2 minutes after having clicked depending on your hosting efficiency, you just have to refresh the page to see the download links. After that unzip the file and import the project in the appropriate software to generate your app.

Builds:
From here you can generate the APK of your Android app. The APK is the file that you can directly install on your phone, distribute to your clients and/or publish it on Google Play.
Click on “Generate build”, wait a few seconds or minutes, and once it is built (you should receive an email) you can refresh the page to see the link to download your APK.

Generate and publish iOS Application:

Remaining build: displays how many builds are remaining. This number depends on the license you have bought and how many build (applications) you have already generated.
iTunes Connect Login and Password: just enter your developer account information here.
Languages: in which language you want your app to be publish on the App Store. Only one language can be selected.
Options:
- With ads functionality: if you have the intent to display some ads in your application, banners or interstitials, you can check this. Before generating your app or once it is submitted to review, you absolutely need to have enter the AdMob information to display the ads in your app. Because if you submit your app with no ads while you have generated it with the AdMob framework within, it will be rejected by Apple: for Apple, an application that embed an ad framework MUST display ads otherwise it is rejected.
- With background audio playing: if you have added some audio items in your application, like a radio or some songs, you may want that your users keep listening to the music even if the application is closed or if the phone is locked. That’s the aim of the “background audio” mode. By activating it your app will be able to broadcast the sounds even if it is in background or if the phone is locked. But you have to choose this with caution. Apple rejects the applications that are using the background audio mode if they are not strictly from the music area. So if you check this option while your app is for a restaurant your app will be rejected, even if you have added some tracks that can related to the restaurant. So only apps for bands, DJs, radios, even disco, can be generated with the “background audio” mode enabled.
Save publication settings : you can save your publication settings with this button.
Generate and Publish: when clicking on this button your application will be in queue for being generated. You will receive an email when the app is generated or if there is a problem with it. Once your app has been built and is sent to your iTunes Connect account successfully you can keep publishing your application by following this article from step 4:
https://doc.siberiancms.com/knowledge-base/publication-on-the-app-store/
Certificate:
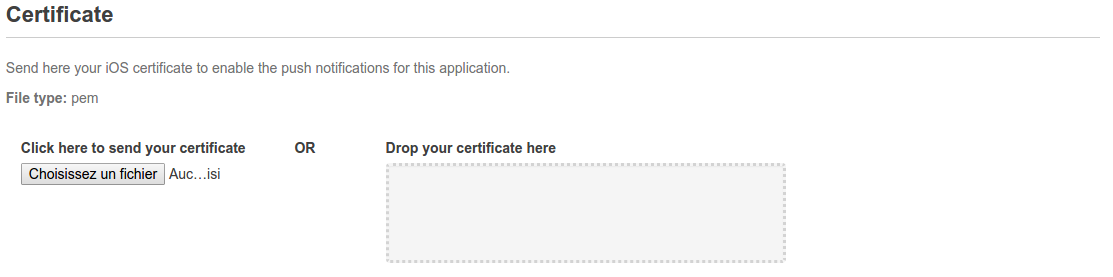
That’s the place from which you can download your .pem certificate to enable the push notifications for your iOS application. Android and iOS applications are working differently regarding the push notifications. For Android, you can use only one API Key for all your applications, it is not managed by application. For iOS, it is managed by application and with a certificate unlike Android that uses only API keys. This certificate is named .pem certificate and it must be created during the process of generating your application. It is made and sent to your backoffice automatically if you use the iOS Auto-Publish module, or you can make it yourself if you build the app manually. Once you have made it you can upload it to your backoffice from this section.
Manage Access:

You can see the list of the users who have access to this application from the editor. These persons will be able to manage this application (add features, change colors, send notifications, etc.) depending on the roles you gave them.
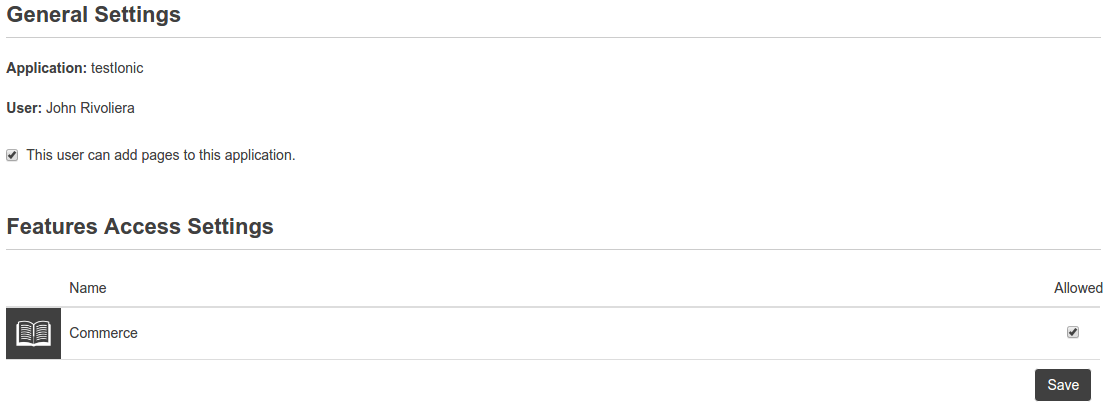
Click on the “edit” icon on the right to display more options:

- General settings: uncheck “This user can add pages to this application” if you don’t want that this user can add new features/pages to this application. The section “Add Pages” will be removed for this user.

- Features Access Settings: from here you will be able to choose the pages that this user can or cannot access and modify. It is different than the “Roles” in the sense it goes deeper than the role itself. With a role you can choose if a user can use this or that feature, but you cannot change the access to a specific page of a specific application. That’s why this section, to allow you to choose if a specific user can access a specific page or not.

In this section you will be able to create some popups that will be displayed in your editor with the aim to bring more information about the features to your users. For more information about that you can check this article.

From here you will be able to see the list of all the subscriptions made on your platform.
The subscriptions are managed automatically, that means a subscription is disabled automatically if it cannot be processed. You can also disable a subscription manually by clicking on the “edit” icon and unchecking the “This subscription is active” checkbox.

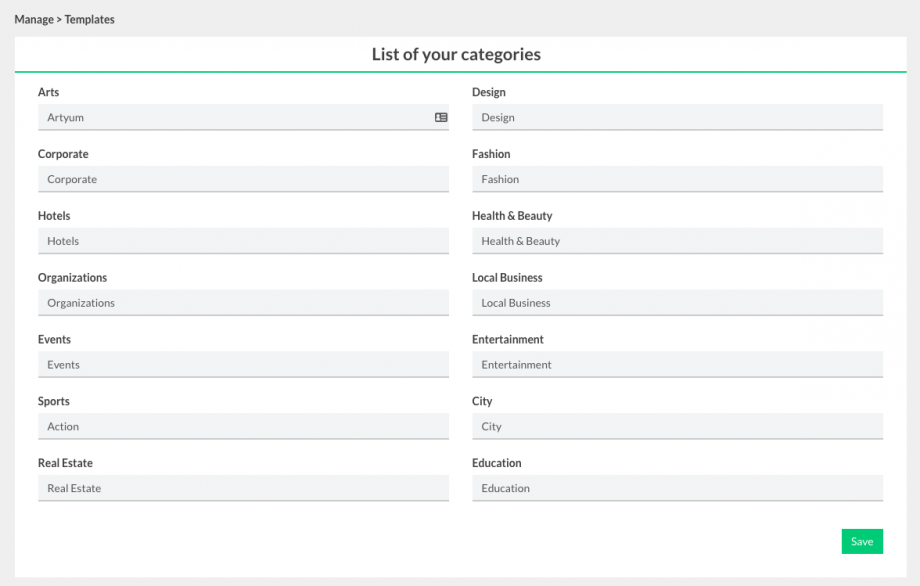
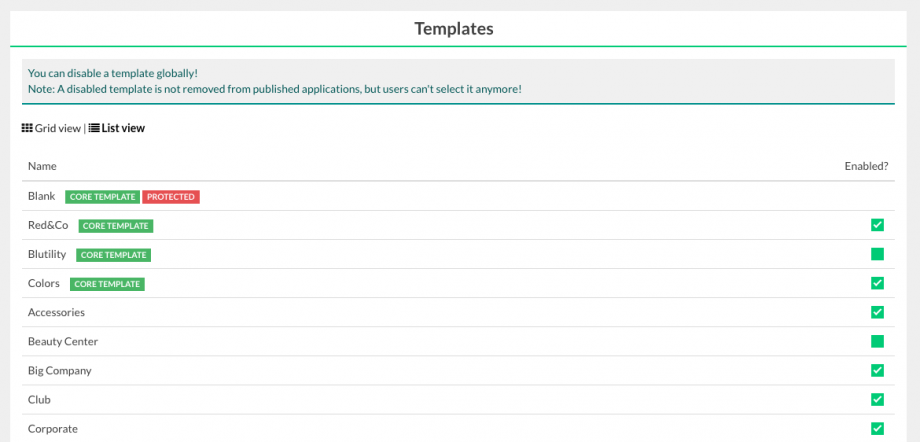
It’s the place from which you can change the name of your templates categories.
In Siberian 4.15.0 we introduced a new section to manage the Templates (you can see installed templates as a Grid or List view) and disable them.
 .
. 
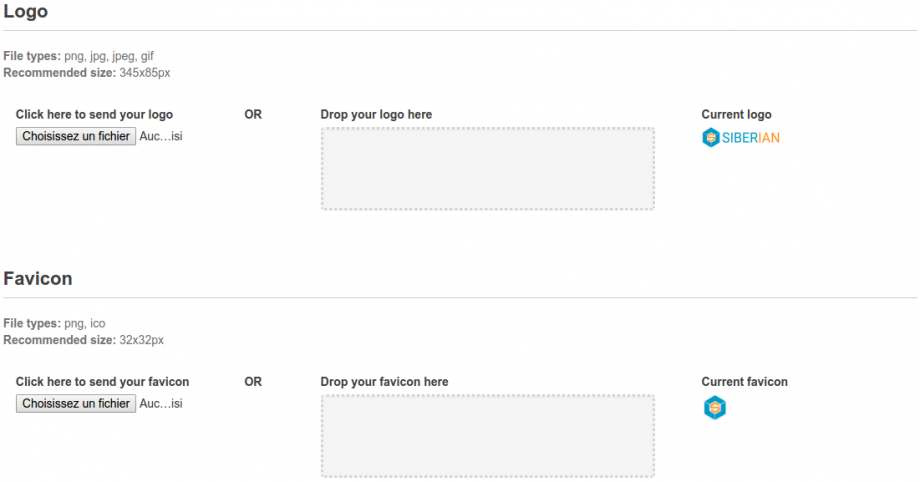
Logo and Favicon: upload your own logo and favicon to customize the logos and favicons used by your editor and backoffice.
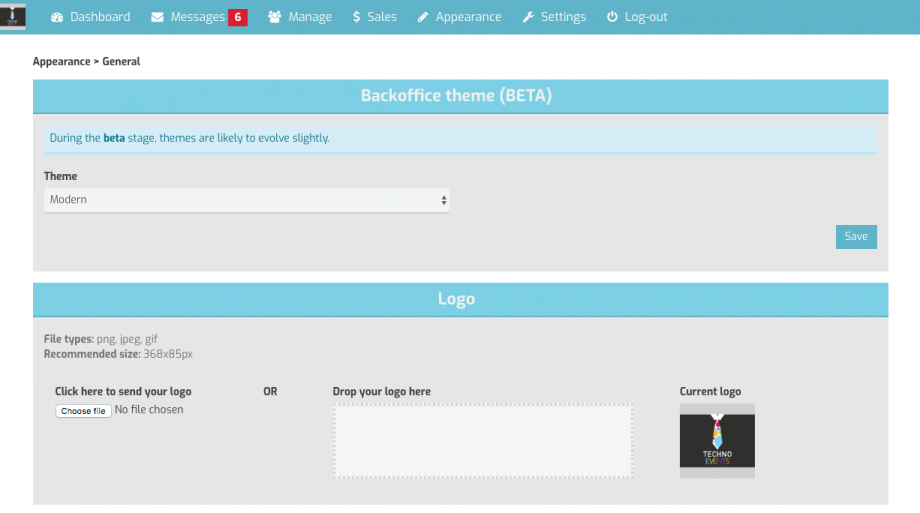
In Siberian 4.15.0 we introduced two new Backoffice themes, you can select one in the Theme section
The actual default theme
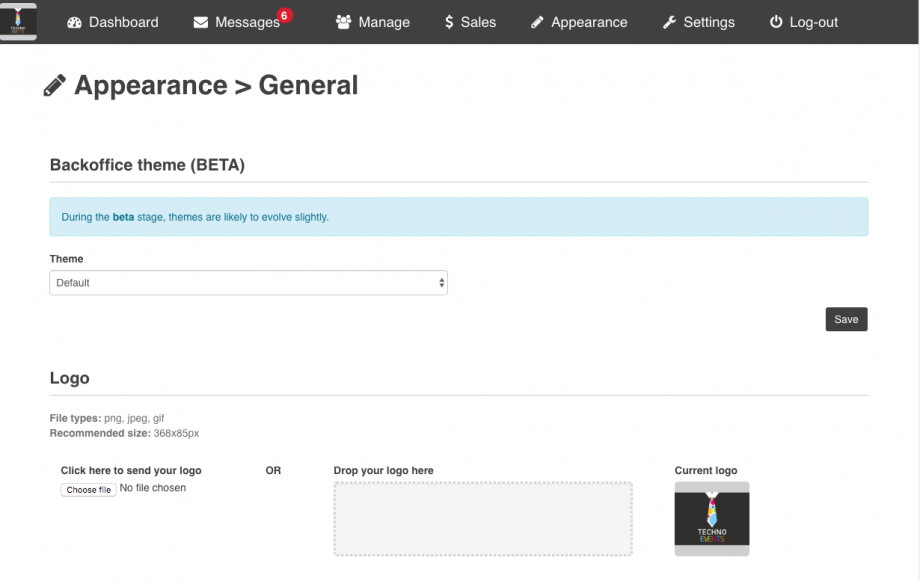
Elegance theme

Modern theme
Your Platform:
Just enter the name of your platform, it will be displayed on the login page and used for the communication with your users.

Your iOS autobuild License Key:
If you have bough the “iOS Auto-Publish” module, you have to enter your license key here.

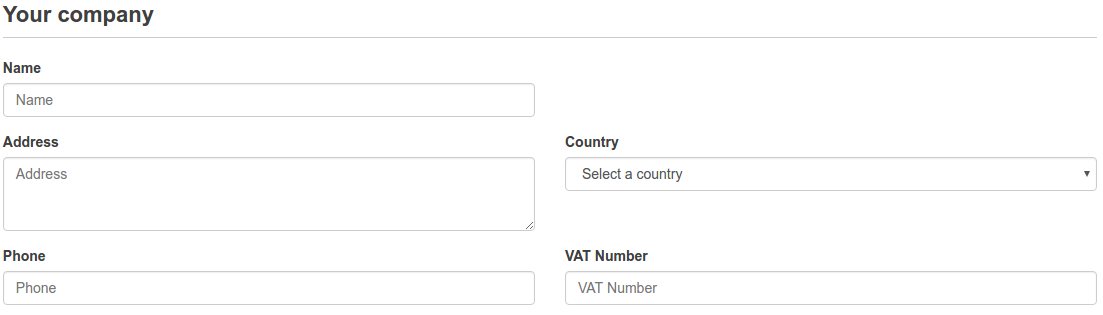
Your company:
Your company’s information. In the Platform Edition it will be used in your invoices.
Your location:
These information will be used for several items: the global time of your CMS, the time to send the notifications, etc.

Your Applications:
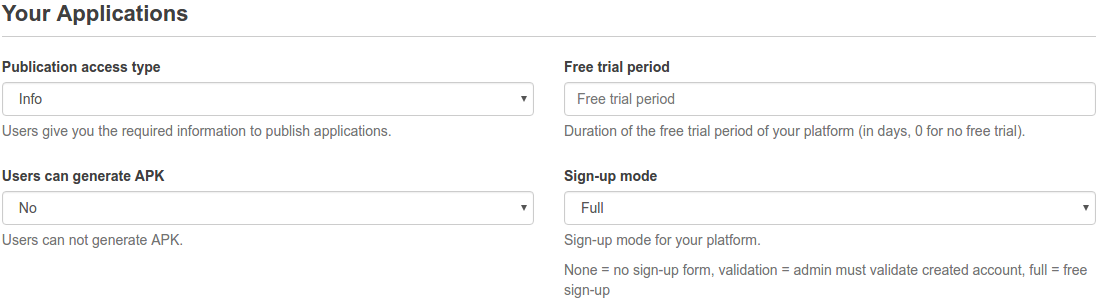
Publication access type:” choose wether your users can download the source codes of their applications from the editor or not. It is a global setting, that means all the users of your CMS will have this option by default. However, as seen previously in the “Manage > Users > Users” menu, you can adjust this option per user.
Users can generate APK:” here again, you can choose if your users will be able to generate the APK of their application from the editor. As previously, it is a global setting, that means all the users of your CMS will have this option by default. However, as seen previously in the “Manage > Users > Users” menu, you can adjust this option per user.
Free trial period (Platform Edition):” you can choose to set a free period for your applications. That means if you set a free period of 5 days for example, a user will have 5 days to test an application. One the period is over he will not be able to access to the management of his app in the editor and he will be sent to the payment page. As previously, it is a global setting, that means all the users of your CMS will have this option by default. However, as seen previously in the “Manage > Applications” menu, you can adjust this option per user.
Sign-up mode (Platform Edition):” this item will impact the login page of your platform. You can choose if your users can sign-up (choose “full”) or if you prefer to disable the signup (choose “none”) or if your users can signup but their account must be validated by you before being valid (choose “validation”).
Analytics:
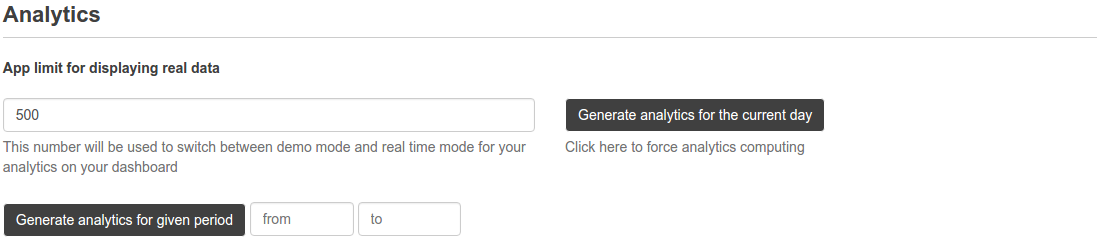
App limit for displaying real data:” one specific user may be able to build several applications on your CMS (if you own a MAE or a PE). From his dashboard, in your editor, this user will see a recap of the analytics of all his applications. You may want to choose from how many applications per user you display analytics. If you choose 2 and a user has only one application he will not see any analytics.
Generate analytics form the current day:” the analytics are generated each night for the day before, but if you want to force to generate the analytics for the current day, just click on this button.
Generate analytics for given period:” ???
Default privacy policy:

Here you can edit the default privacy policy to be used as default in all new created applications.
Advertising:
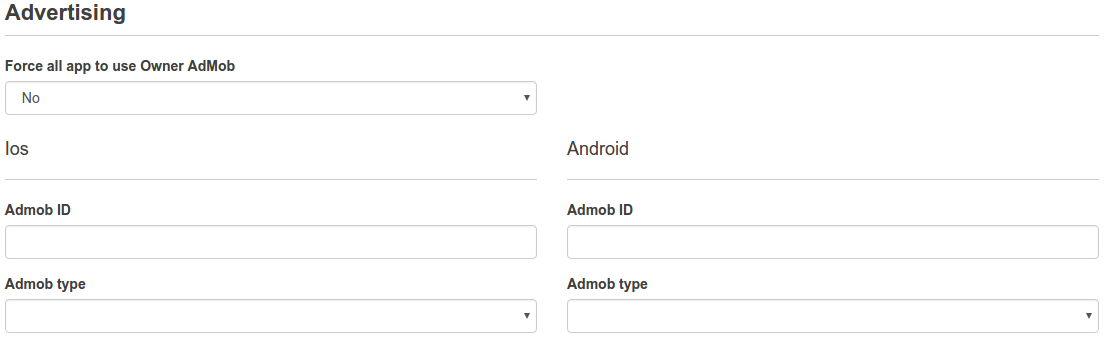 Check this article to see how to use ads in your applications with AdMob
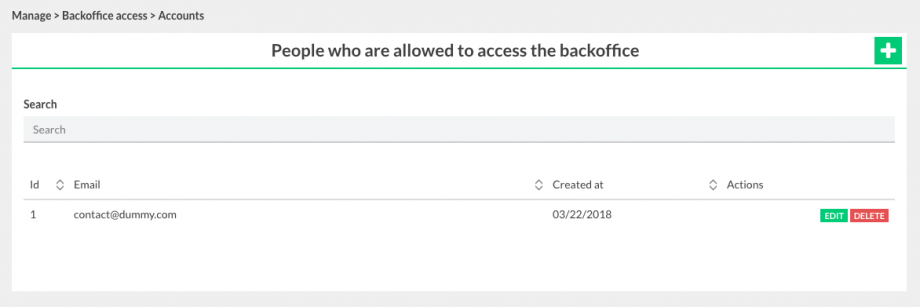 The list of the accounts of the users who can access to your backoffice. Create accounts only for users you know and who have the needs to access to your backoffice. For example users who create applications don’t need to access to your backoffice and you must not create an account for them from here.
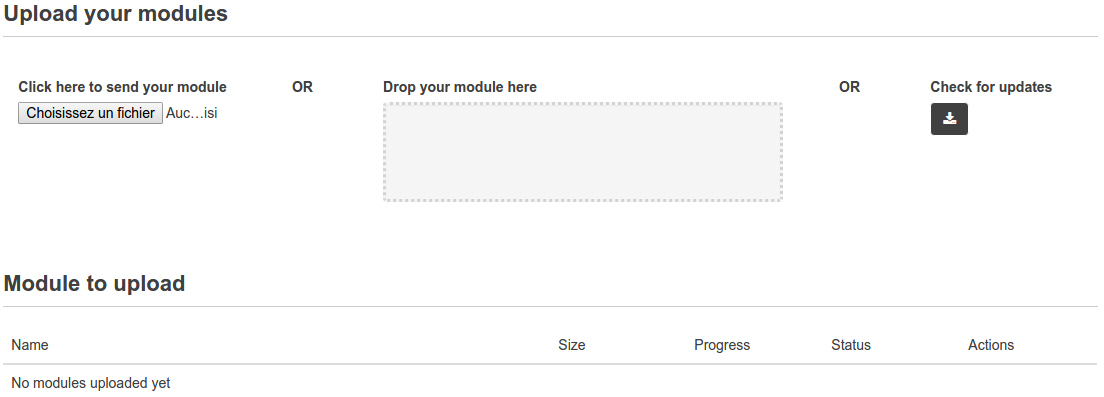 That’s the place for installing a module or updating your CMS. You can check this video to see how to install a module or update your Siberian.
Several features of your CMS need an access to external services. For example, if you want to display some Youtube videos in your applications your CMS will need to communicate with Youtube, and to do that you need a Youtube API key.
Check these articles to see:
how to create API keys for Facebook and Soundcloud
How to create an API key for Youtube
How to create an API key for Googlemaps (enables the map in several features of your apps)
How to create an API key for Paypal (Platform Edition)
How to create an API key for 2checkout (Platform Edition)
How to create an API key for Stripe (Platform Edition)
How to create an API key for Yandex (to help you translate your CMS with ease)
As seen previously, in the Manage > Applications section, the push notifications are managed differently between iOS and Android. Since for Android you can use only one API key for all the applications made on your CMS, you just have to create your API key, enter it here and all your applications will use this API key for sending push notifications on Android devices.
Disable cron jobs: choose if you prefer to disable the cron jobs. The cron jobs are some tasks that are automated, like generating the sources of your apps, sending the push notifications, generating the APK). If you disable the cron jobs many features will not work so we recommend to not disable it. This option exists mainly for the SAE owner as sometimes the cron jobs cannot be automatically set, and they have an option to download the source code of their app without using the cron job.
CRON Scheduler interval: you can choose the time interval between two cron jobs. By default it is set to 60s, that means every minute the cron will check if there are some tasks to be done (push notifications or an APK generation request in queue for example).

System tasks, Module/User tasks, APK queue status, Source Queue status: from here you can check more information and logs about some tasks on your system. It is mainly used for support and see if all is functioning correctly in your CMS.
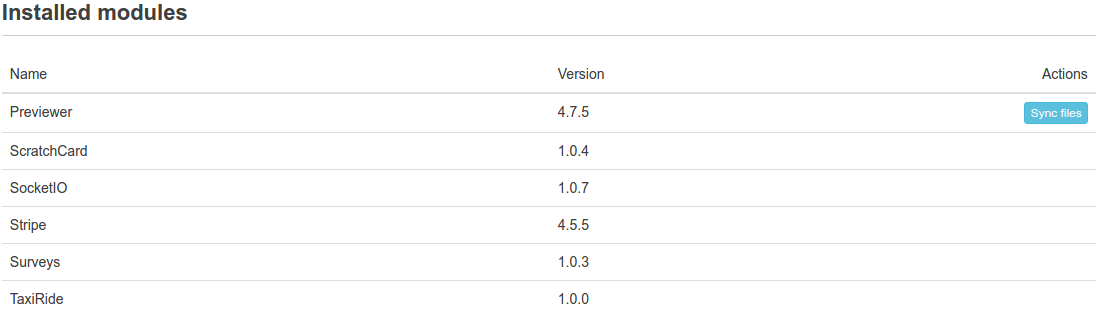
From this menu you can see the list of the modules and layouts that you have installed in your CMS and their version.

From this menu you can see the list of the whitelabels created on your platform.
Application settings:
Choose if you want to set your CMS in “development mode”. This mode is used to display the errors in your CMS. By default errors and warnings are hidden in your CMS, but you may prefer to display the errors to get more information and fix a problem you may encounter.

The “beta” update channel can be used by beta testers who want to test some updates before they are officially released for production.
HTTPS & SSL Certificates:

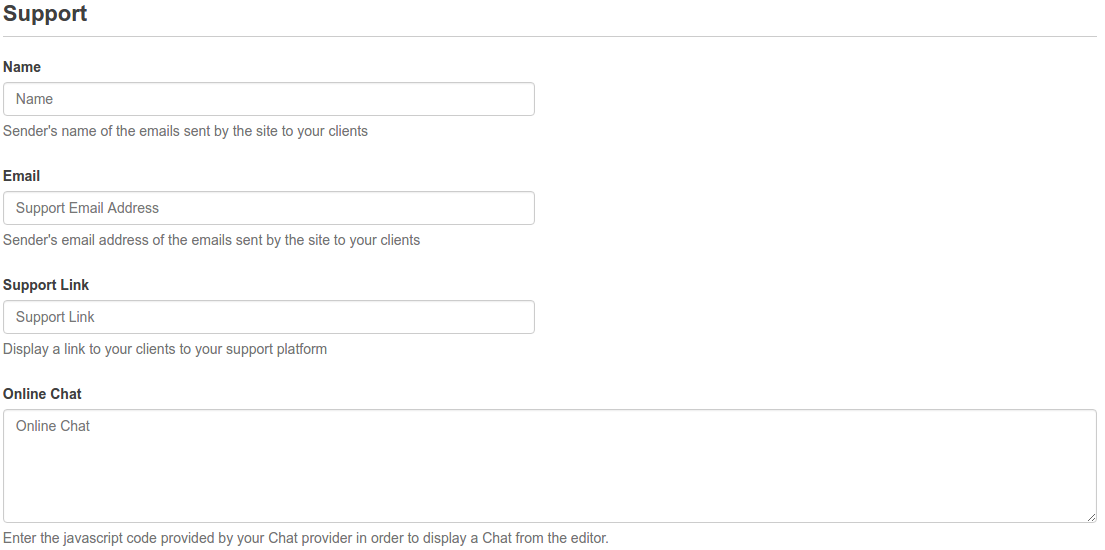
Support:
In this section just enter the information that will be used to communicate with your editor’s users.
If you want to add a chat support, like Olark.com for example, in your editor to communicate with your users, just enter in the “Online Chat” section the javascript code provided by the Chat provider.
Custom SMTP Configuration:
In this section you can enable custom SMTP configuration.
See how to configure an external SMTP server

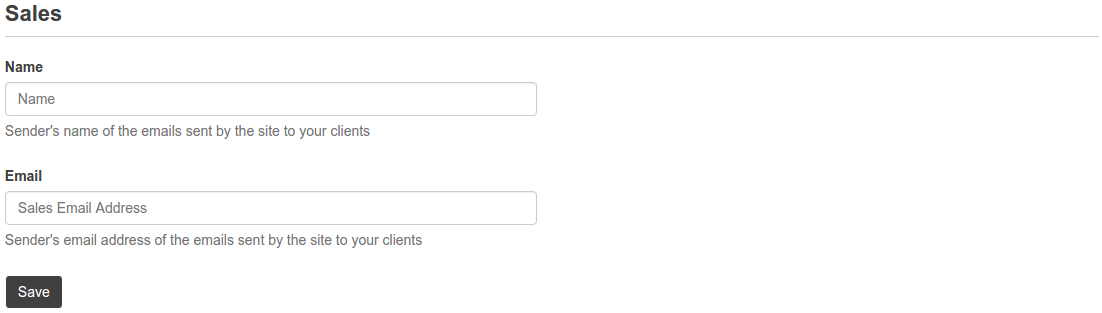
Sales (Platform Edition):
The name and email that will be used to communicate with your users when they have bought an application on your platform.
You can translate Siberian CMS in any language. To do that, and if a language package is not available from our marketplace, you just have to choose a language in the list and add it. Then just translate all the files one by one. The new language will be available in your editor.
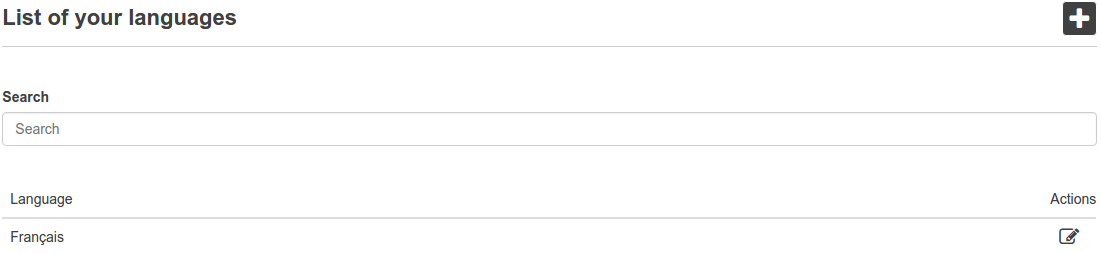
To see how to install a language package you can also check this video.
Editor’s functions
Menus for managing your application
- You can check this article with short videos to see how to use the menus to create your application
- From here you can access to the features documentation
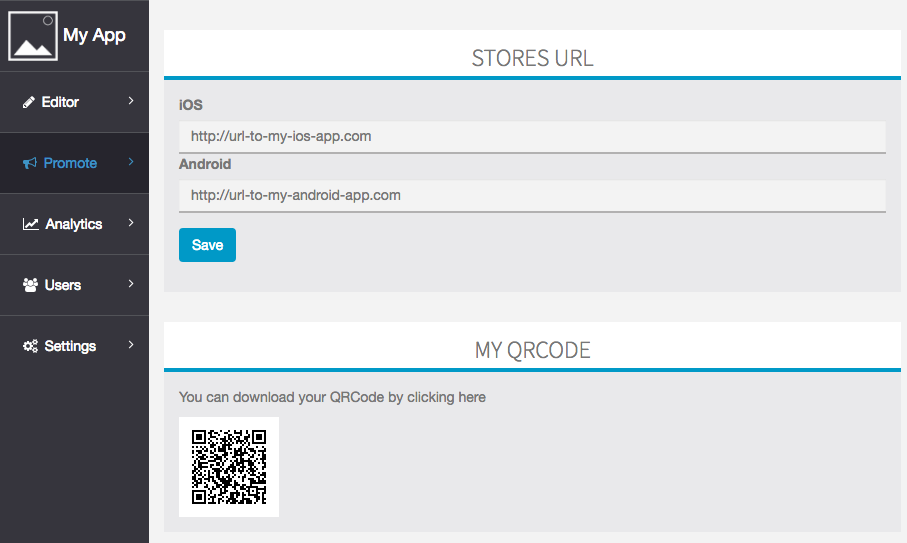
- Allows the app admin to enter the URL to the stores to download his application. A QR Code is created based on these URLs. When a user flashes this code he is redirected to the stores associated to his device in order to download the app (note that if the user has no iOS or Android device, he will be sent to the web app version which will open in the browser of the device). So, after the app is published on the stores, the app owner can transmit this code to his users so that they download his application. The users flash the code and they are redirected to the stores in order to download the app.
- These URLs are also used for different actions by Siberian: for example they are used when a user shares a content on the social networks: the URL which is shared contains these two URLs in a script. That means when another user will click on the shared content he will be redirected to the stores associated to his device in order to download the app (exactly like he would have flashed a QR Code).
- This is the place to get the list of the users who have created an account in the mobile application. You can also create a user account manually from here.
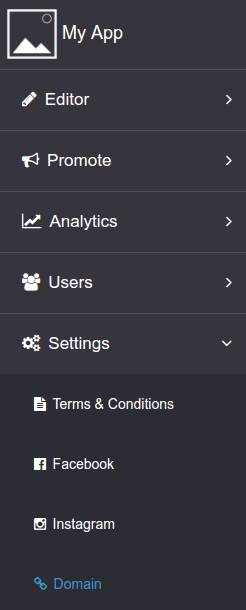
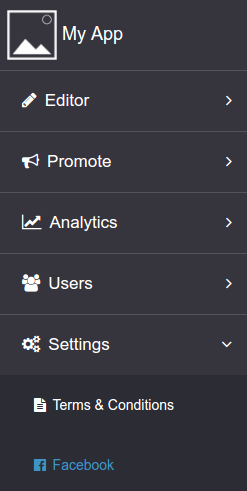
- Terms & Conditions:
– A place to enter the terms of use for some specific features, like Loyalty Card, Discounts, etc if needed. When you enter a T&C it is is displayed through a link/button in the feature itself.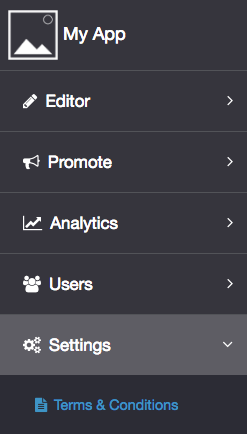
- APIs:
Here you can enter your API keys for Facebook, Twitter, Instagram and Flickr:


– Facebook:
Needed to enable some features of Siberian: displaying a Facebook fan page in the application and allowing the users of the app to connect with Facebook. If the Facebook API Keys are correcty created and saved here, the app admin will be able to add a Facebook fan page, and to allow the users to connect to the app with their Facebook account (no need for them to create a new account in the application).
Note that you will find the same keys in the Siberian backoffice. Why? It’s an option. If you have entered the Facebook keys in the Siberian backoffice, the one in the editor are not mandatory. But when a user will click to connect with his Facebook account, Facebook opens a window to ask the user if he is okay to share some of his info with the Facebook application, and the Facebook application which will appear will be the one which has been used to create the keys for the backoffice. So that can be a Facebook application with a generic name, and not the name of the mobile application, thus the user can be a little bit confused. That’s why the Facebook API key are also available in the editor, this way an app admin can create his own API keys to display his application name in the Facebook window asking for the user permissions.
Also note that using the API keys in the editor is mandatory if the application has a custom domain name (see below). In case of a custom domain name the Facebook keys of the editor will not work since they would (surely) not have been set up with this custom domain.
– Twitter:
See how to create your Twitter API keys for the Twitter feature.
– Instagram:
API keys used to display the images from the account of a specific user. You have to be connected under this Instagram account when you create the Instagram API keys.
– Flickr:
API keys used to display the images from the account of a specific user. You have to be connected under this Flickr account when you create the Flickr API keys.
- Domain:

– here is displayed the URL of the application:- This URL is VERY important: it used by the mobile application to retrieve the content of the app (the app is compiled with the URL in it, so if the URL is changed after the app has been compiled it will not open anymore, you would have to compile/publish again)
- you can change the domain/URL by the one you want: by default the domain/URL of the app is something based on the domain of the Siberian + a random string of characters, like your-cms-domain.com/5647d7756f, but one may prefer to have his own custom domain, like mobile.my-restaurant.com. You can do that by creating a CNAME (mobile.my-restaurant.com) that you point on the Siberian domain (your-cms-domain.com, to keep our previous example)
- Advanced:

- Enable offline content: if you want to allow the user to download the content of the app to be able to consult it when he has no connection on his device)
- Google Maps Javascript API keys: needed to enable some features using Google Maps, like Maps, Taxi, Contact, etc
- The “Fidelity points” option is used to define the value of the points that users can obtain in the feature called “Scratch Card”. So if you don’t use this feature you don’t have to modify this value.

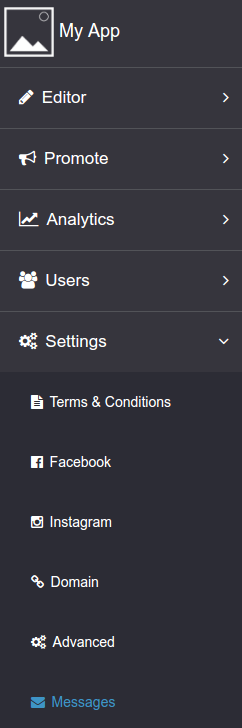
This section allows an app admin to discuss with another member of his team about the application. You can be several persons to create the application and so you may want to inform the other persons about what you’ve done, the problem you have detected, etc. This is a place for discussing about that and let messages to the other persons who work on the application.
General Menu:

it’s the main screen from which the connected admin can access all his applications, and see the analytics.

it’s the screen from which the connected admin can access his account information

- it’s the place from which an app admin can create other accounts for other persons who would also manage or work to the creation of the application.
- The app admin who creates an account can choose a role for the other person. The roles which are available here are the ones that the Siberian admin has created in his backoffice. It’s not possible to create new roles from the editor.
- After the connected admin has created a new account, he can associate this account to some of his applications.
- My Invoices: It’s the place from which a connected admin can see all the invoices about all the applications he has paid for (to get them published)

you can check this article if you are a Platform Edition owner to have complete information on how to set up your system so that this white label function works for your users.
- The Siberian admin can have his own resellers. This option is for them so that they can have their own builder in white label.
- To get their own builder panel in white label (in their domain name and with their own colors) here is the process:
- They have to set up their domain name: to get their builder panel on, for example, my-panel.com, they have to create a CNAME record of their domain name to point it to the Siberian domain (like your your-cms-domain.com), and enter their domain name in this section. This way they can connect to my-panel.com to create/edit/manage their apps and, above all, to let their own clients manage their applications without knowing the Siberian admin which is behind.
- After that, they have to click on the button “Customize my editor” to choose the colors that will be applied on their panel. The changes are taken into effect only on the domain they are using for their panel.