First of all, Siberian CMS is a self-hosted platform. That means you must have a web hosting, and it has to meet the requirements to install Siberian CMS correctly.
The installation, step by step
Installation of Siberian CMS on a WHM/cPanel
Unzip the installation zip file. There is just one small index.php file, it is normal, all the files needed to install Siberian will be downloaded from our servers to your server thanks to this file. Connect to your hosting panel:
![]()
To create the webspace for Siberian, you first have to create an Account. In the top left, type “Create a New Account” and click on the button that will show up. Then fill the fields in the “Domain Information” section:

You can change the other settings below “Package” section, if you know what you are doing, otherwise you can leave them by default. Then hit the ![]() button.
button.
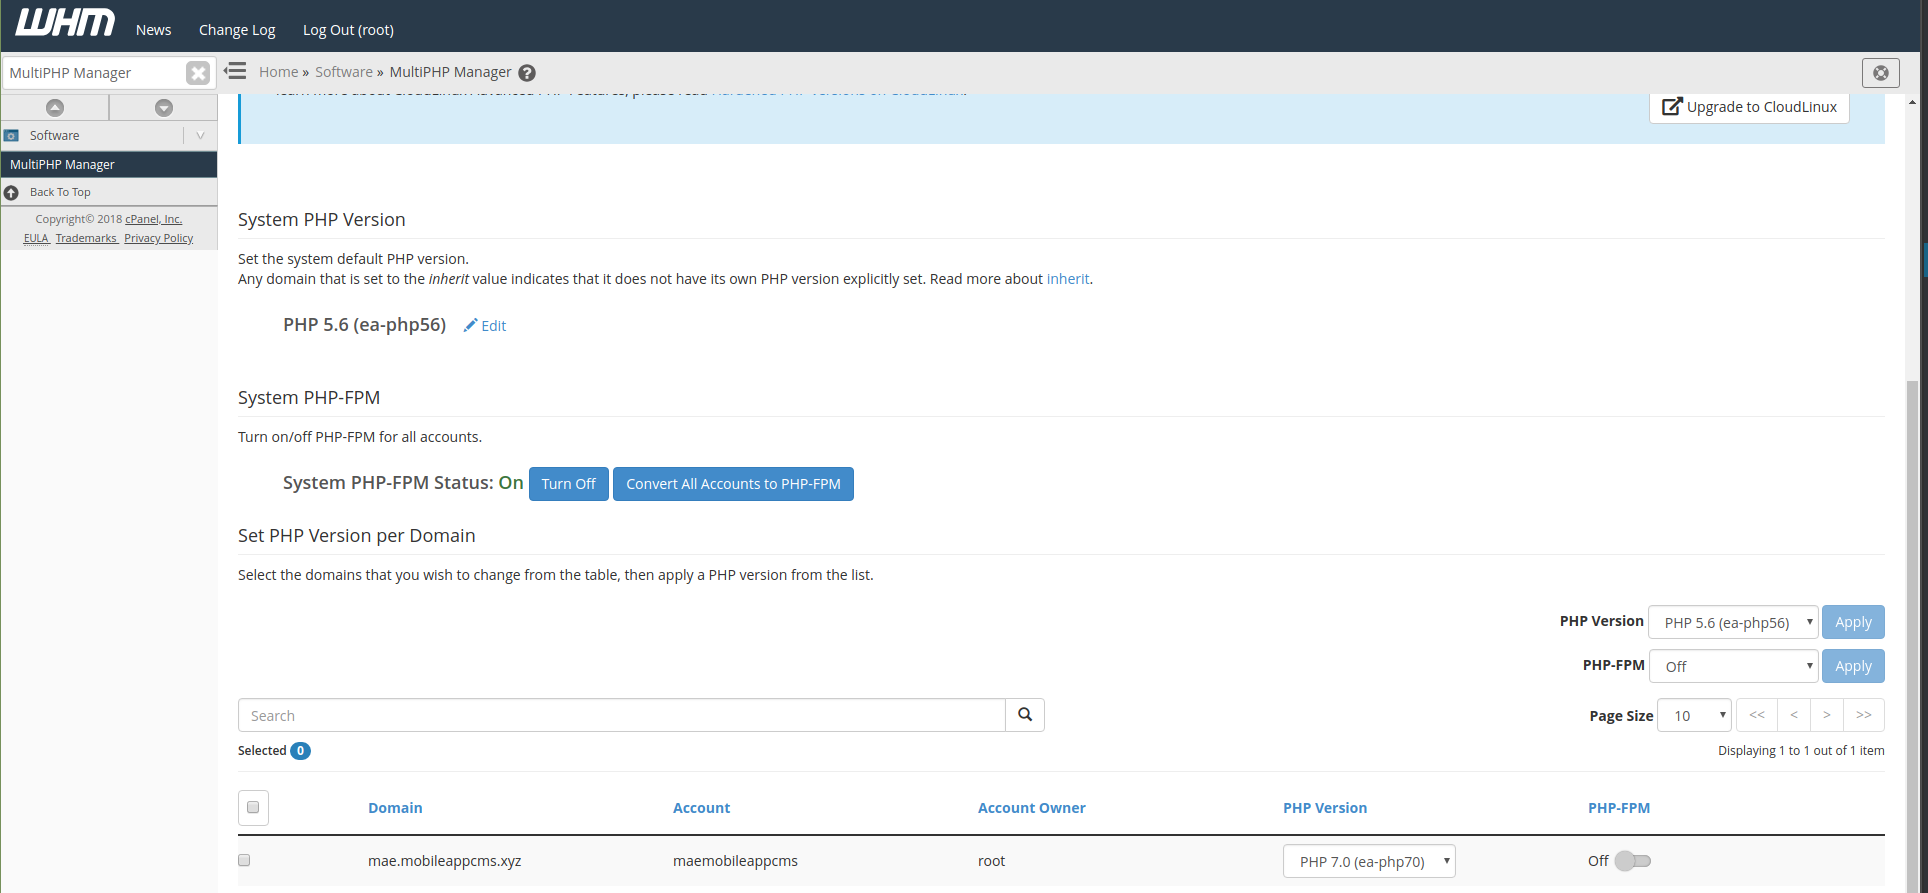
‣ Search for “MultiPHP Manager” in the search field at the top left of the screen. Scroll down, and select PHP 7.3 for your webspace. You also have to disable PHP-FPM:
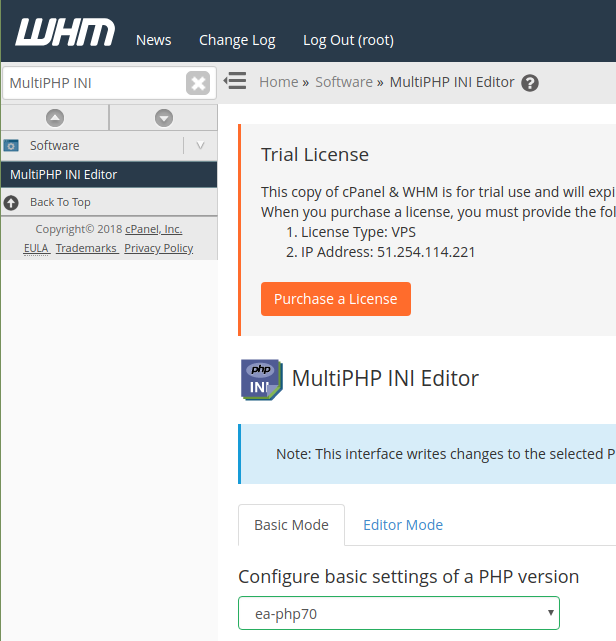
‣ Then search for “MultiPHP INI Editor” in the search field. Select “ea-php73“:
‣ Enable “allow_url_fopen”:

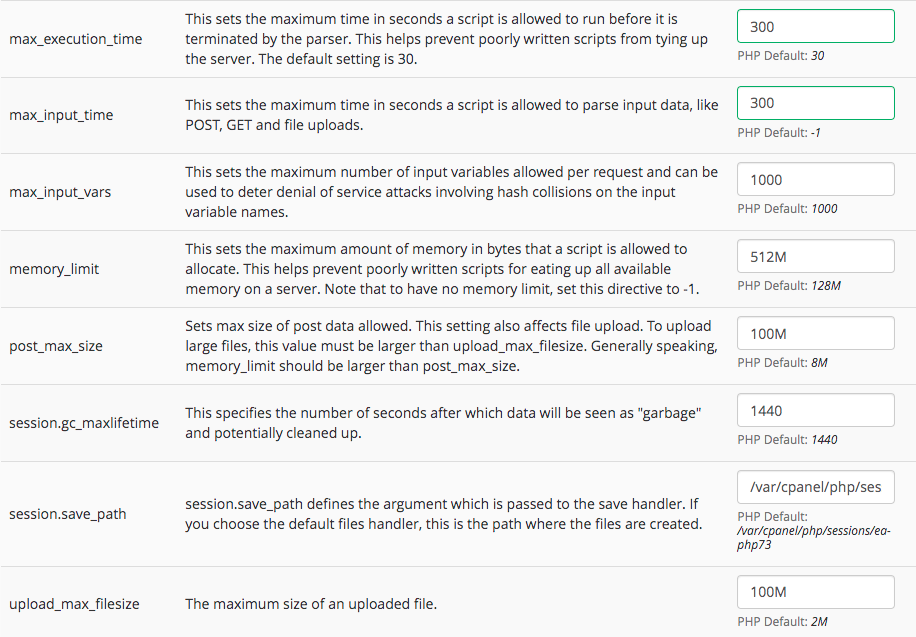
‣ Then follow the values of this screenshot:
‣ Finally, hit the ![]() button.
button.
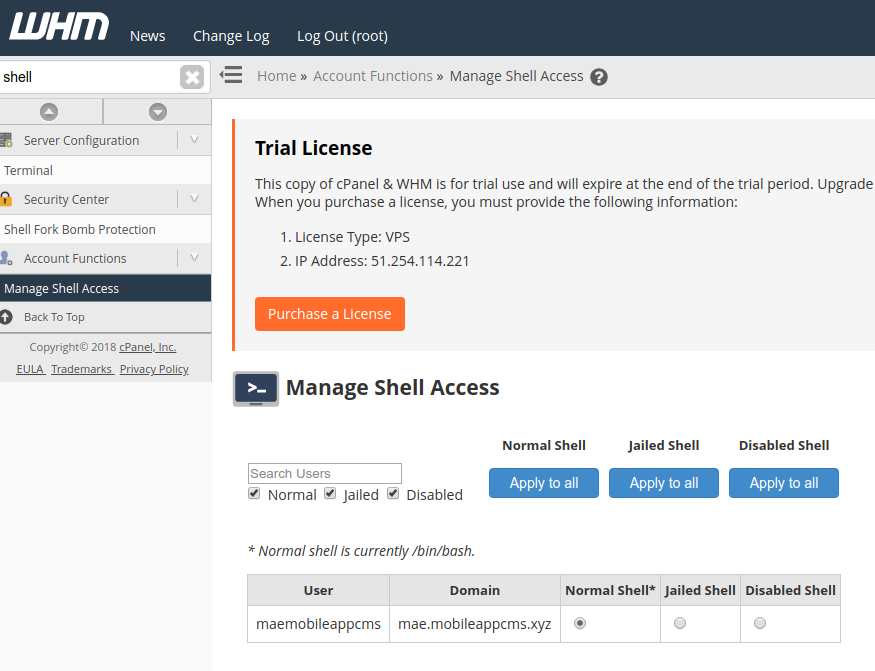
‣ First you have to set the “Shell Access” to Normal. Type “shell” in the search bar at the top left of the screen, then click on “Manage Shell Access”. Make sure that your Domain is on Normal Shell, which is set to /bin/bash:
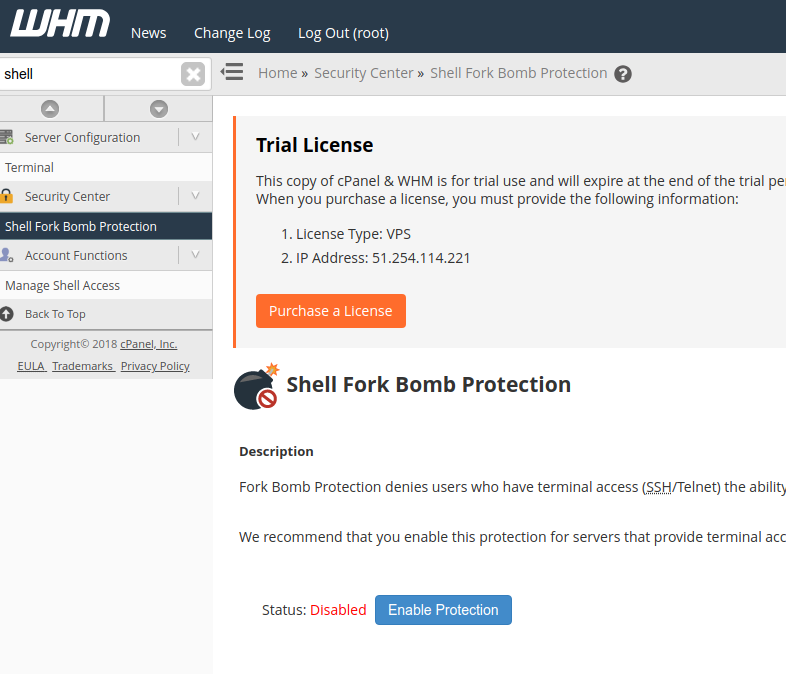
‣ Then, still on the same page, click on “Shell Fork Bomb Protection” in the left menu. Make sure the protection is Disabled:
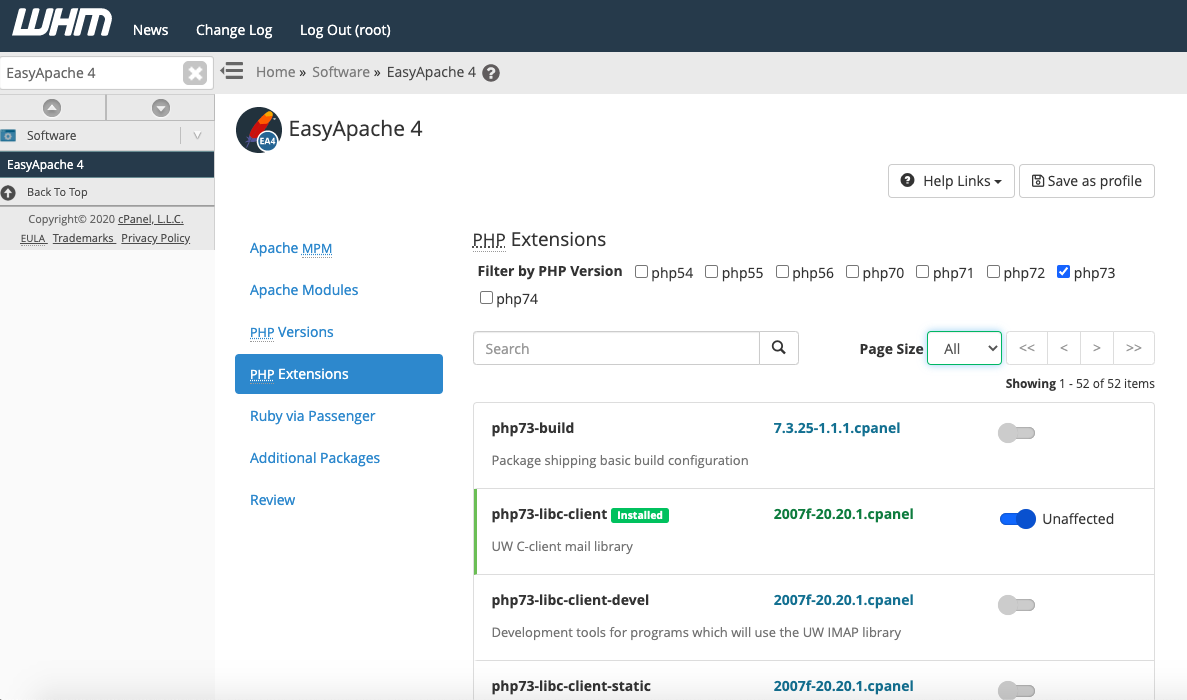
‣ Next, you have to check if all the required PHP extensions are correctly installed. Search for “EasyApache 4” in the search field. Click on ![]() next to “Currently Installed Packages”. Select “PHP Extensions” in the left menu, then Filter only php73:
next to “Currently Installed Packages”. Select “PHP Extensions” in the left menu, then Filter only php73:
‣ If a PHP extension is not installed (ex: iconv), then you have to click on the grey button at the right, to make it blue. Once you have reviewed all of the PHP Extensions (in my screenshot, 52 extensions, 5 pages), click on “Review” in the left menu > ![]() >
> ![]()
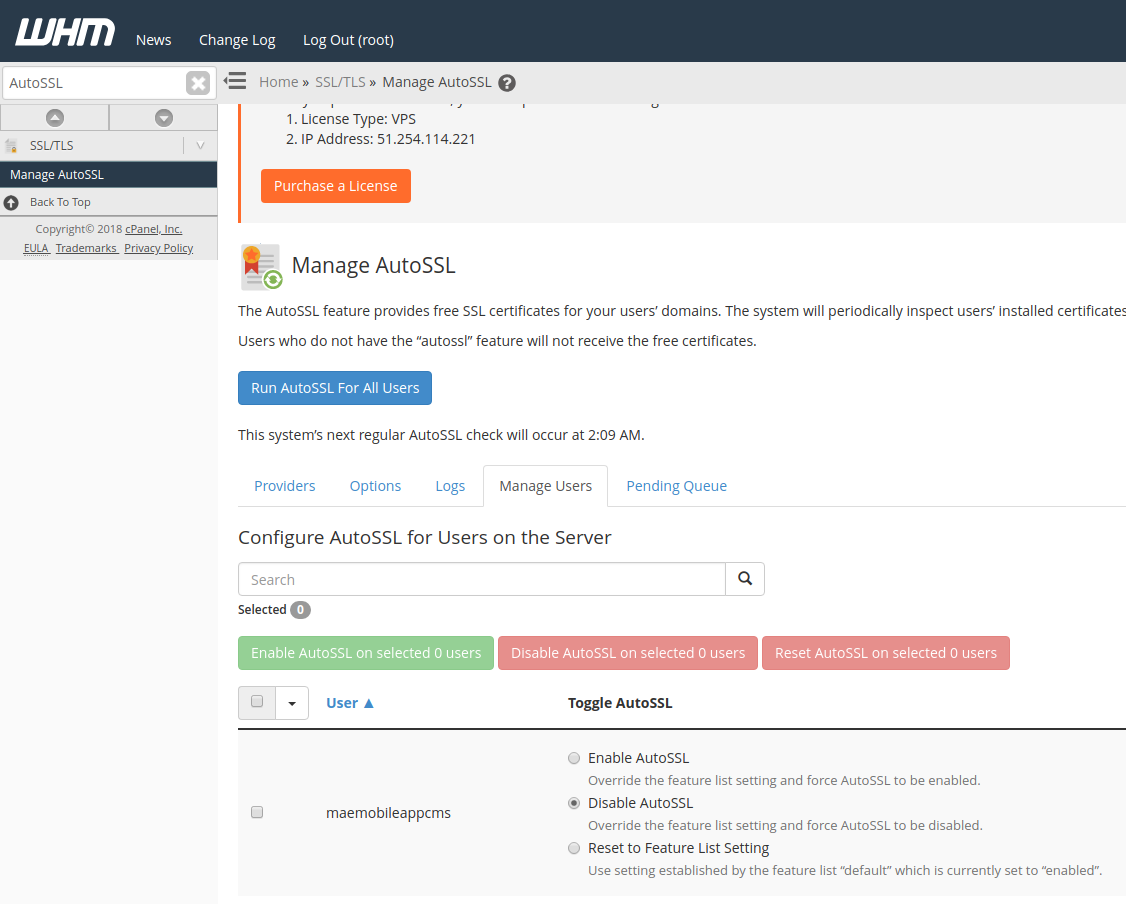
‣ Now, we are going to deactivate AutoSSL for our domain. Search for “AutoSSL” in the search field, then click on the “Manage Users” section. Search for your domain, then click on “Disable AutoSSL”:
‣ Search for “Manage SSL” in the search field:
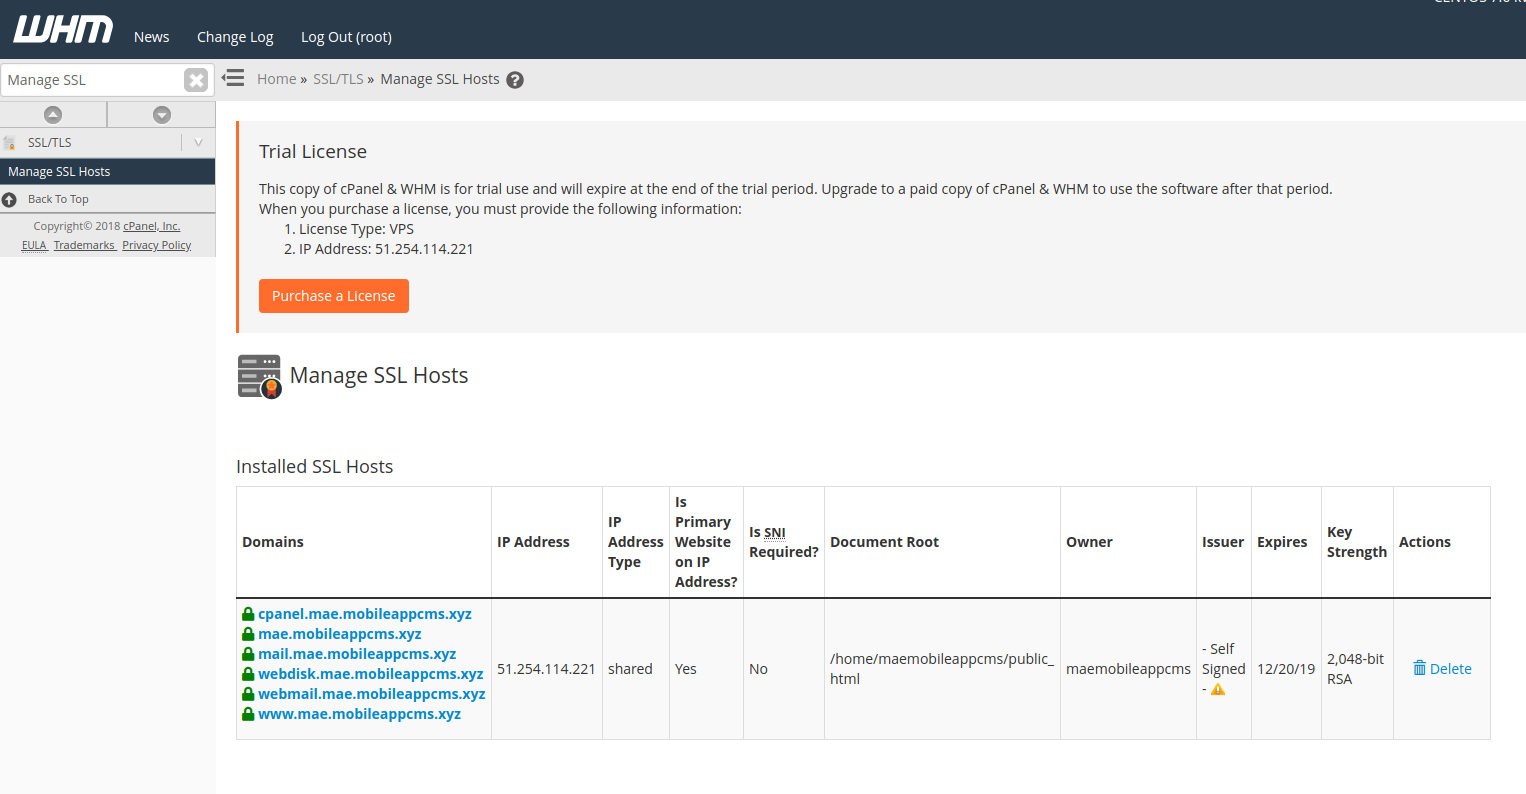
‣ Delete the SSL certificate linked to your Domain.
‣ If you are a Platform Edition owner, you will have to configure WHM to allow White-Labels.
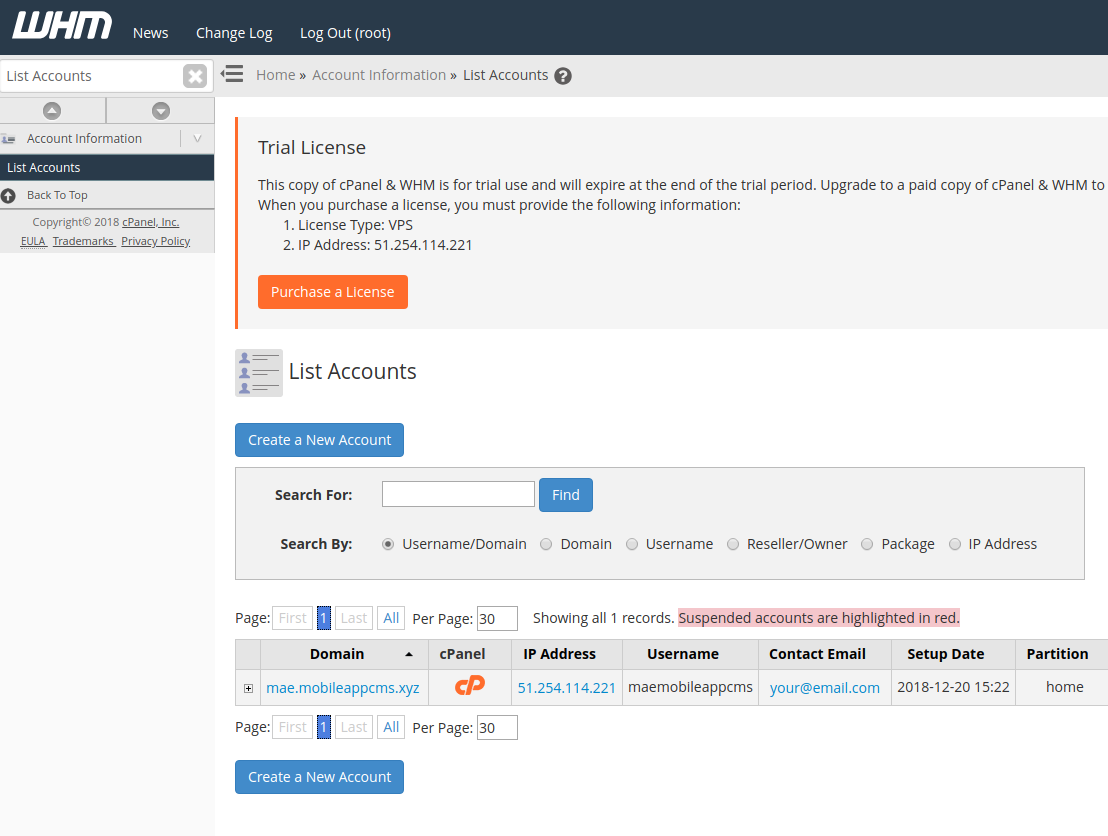
‣ For the next parts, we are going to move to cPanel. Search for “List Accounts” in the search field. Next to your Domain, you have a cPanel logo. Click on it to reach cPanel:
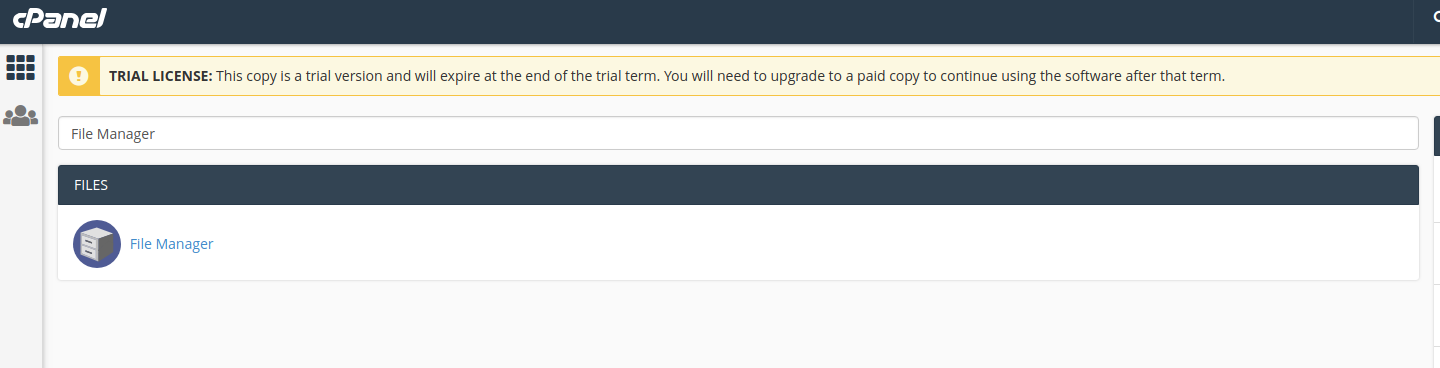
‣ Search for “File Manager” in the search field at the top of cPanel:
‣ Navigate to “public_html” folder, then click on the “Upload” button:
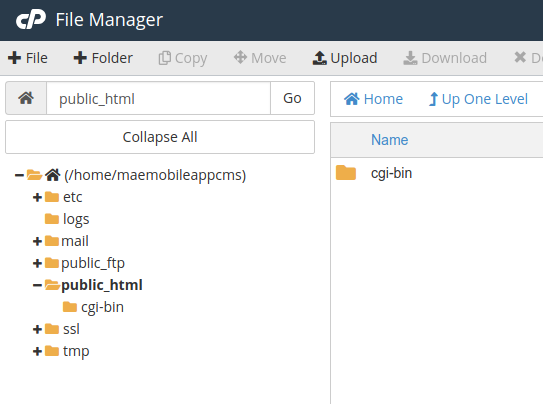
‣ Select your index.php, then go back to cPanel.
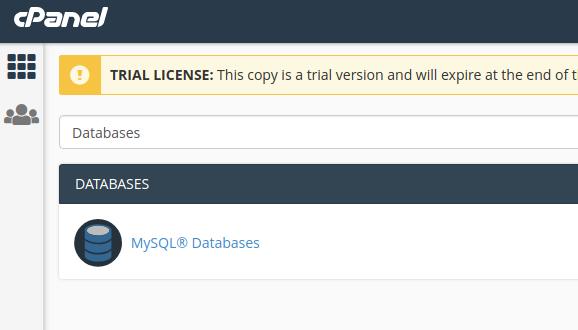
‣ Search for “Databases” in the search field:
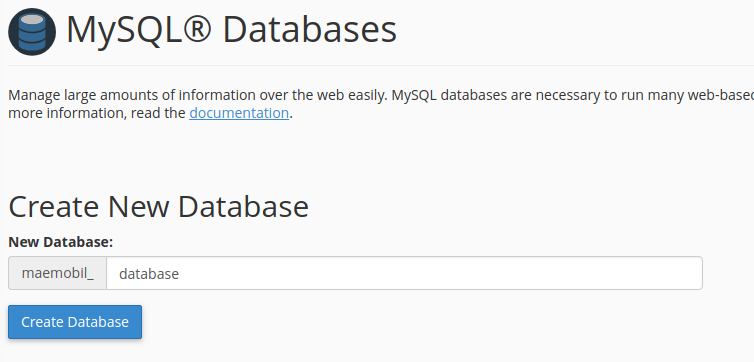
‣ Enter a name for the new database, and click on ![]() :
:
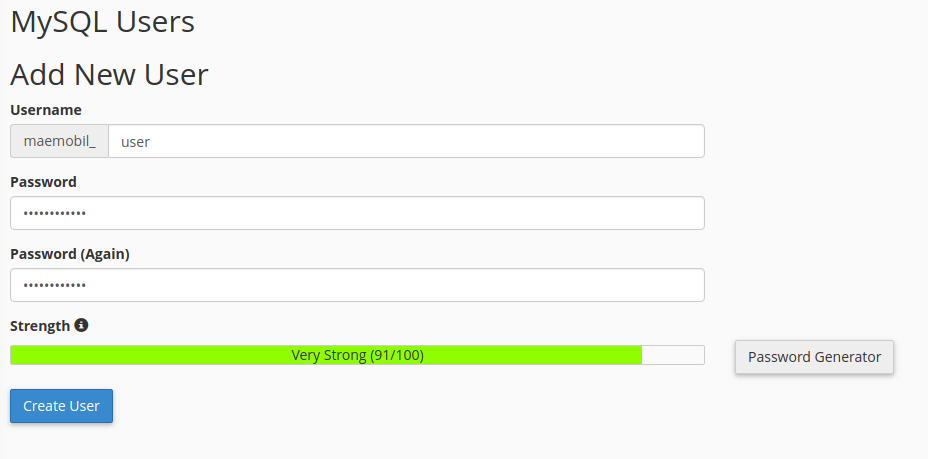
‣ Create the user:
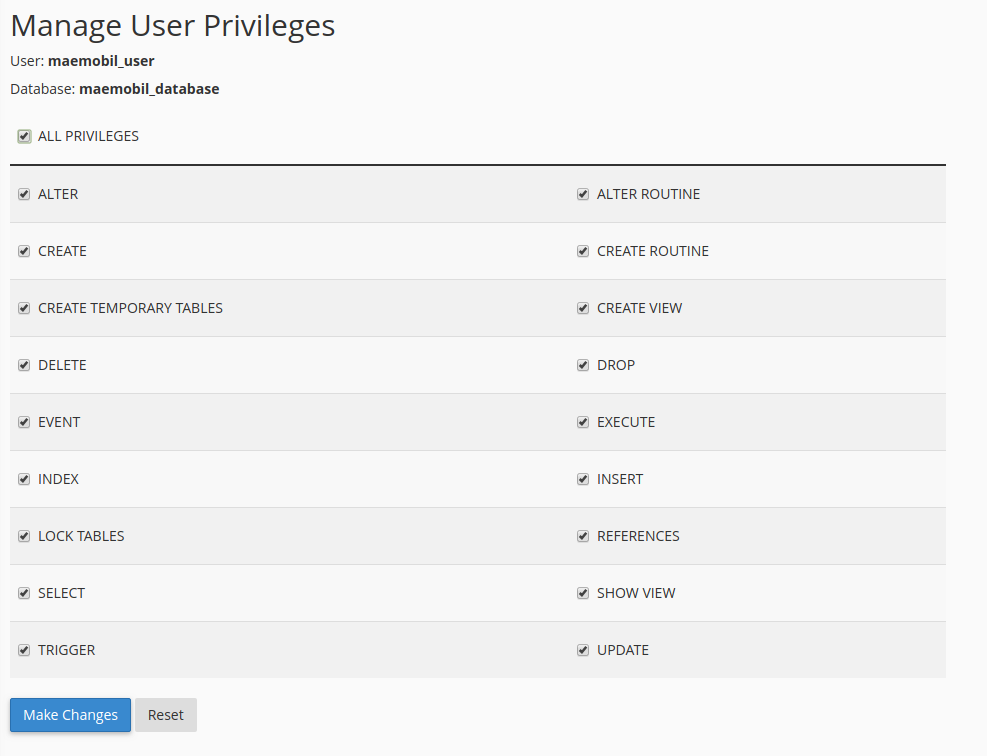
‣ Finally, add the user to the database:
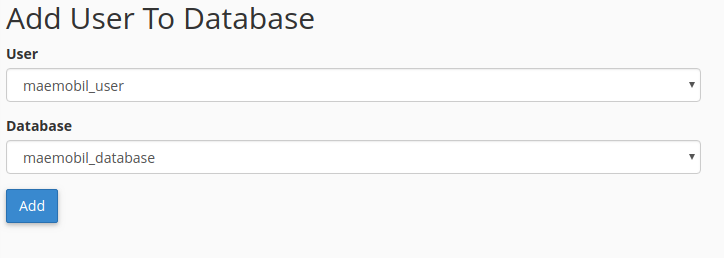
‣ Select all privileges, and click on ![]() :
:
‣ Once you have uploaded the index.php installation file on your website, you can reach the URL of your website from your browser: in my case: “http://demo1.mobileappcms.xyz”
![]()
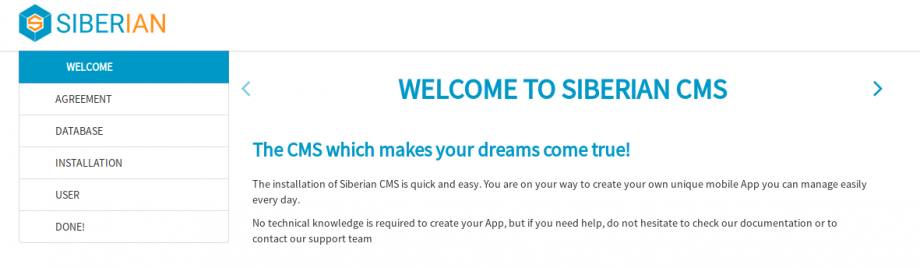
From the page, you will see:
| On Single App Edition: | On Multi Apps and Platform Edition: |
|---|---|
 |
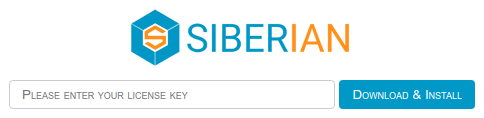 |
‣ If required, enter your license number
You can find your license number in your purchase confirmation mail.
‣ To start the installation, click on Download & Install
‣ Click on ›

https://doc.siberiancms.com/
‣ Read the Terms and conditions, tick the box if you agree, and click on ›

‣ Fill in the database credentials you set up earlier. “Host” is localhost, unless you want to use a distant database.
‣ Then click on ›

‣ Create you user account, then click on ›
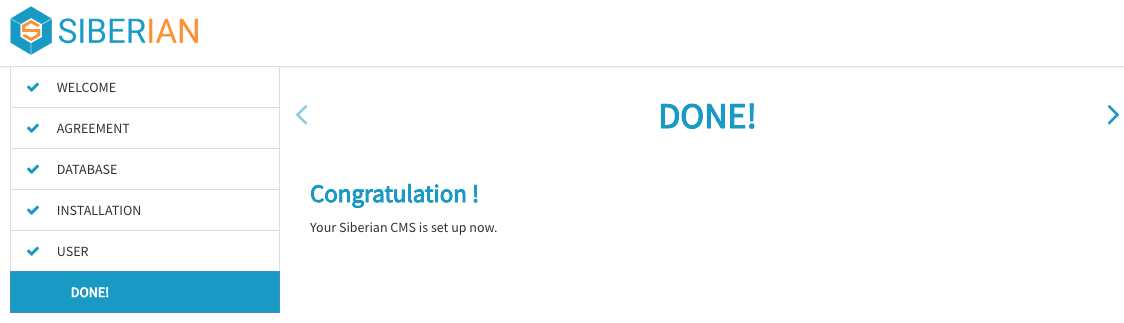
Congratulations, your Siberian is installed !
‣ You can reach your editor with your domain name, http://demo1.mobileappcms.xyz in my case.
![]()
‣ You can reach your backoffice by adding /backoffice to your domain name, https://demo1.mobileappcms.xyz/backoffice in my case.
![]()
From your backoffice, you can now configure your SiberianCMS.