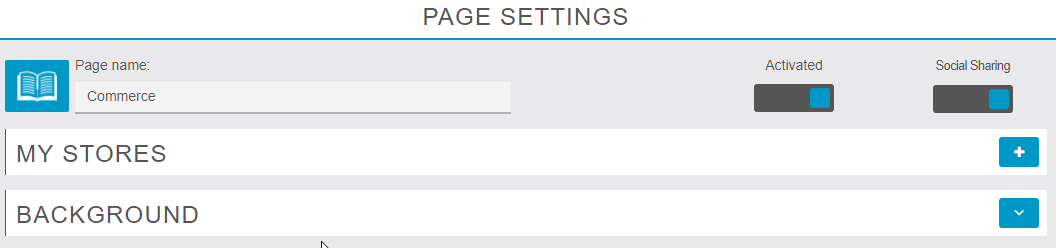
With the Commerce feature you will be able to sell your products from one or several store. Users will be able to pay online via Paypal or Stripe, to pay at your store or at the delivery.
Note: Every stores you will create, will have the same catalog, see it like a “franchise”.
Let’s go! To add “Commerce” feature in your app, click on  in the “Add pages” section:
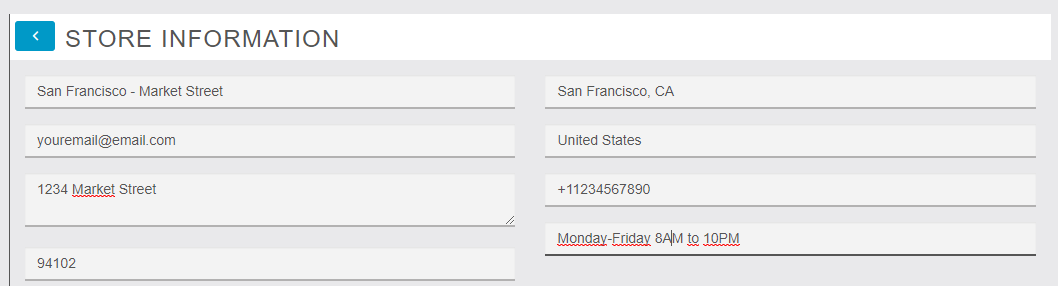
Click on ![]() to add a store and fill out your store’s info:
to add a store and fill out your store’s info:
Then add your delivery options:
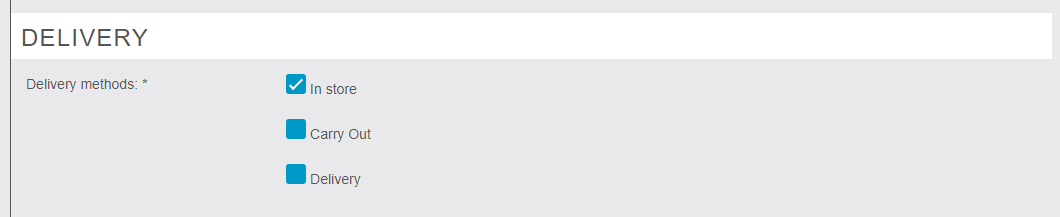
You can choose from:
- “In store”: Your clients will have to come to the store
- “Carry out”: Your clients will have to come to the store to get the product and then leave the store with the product
- “Delivery”: You can deliver your goods to your clients
If you choose “Delivery”, some other options are displayed:
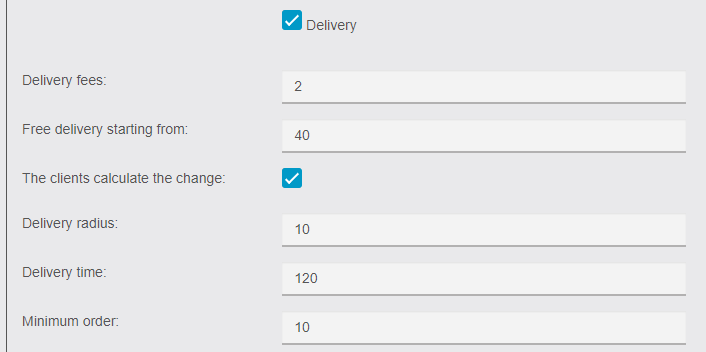
- “Delivery fees”: The cost of the delivery
- “Free delivery starting from”: If you want the delivery to be free when the order reaches a certain price
- “The clients calculate the change”: Add a field at the end of the order where the client will specify the type of cash he will use. For example, if he uses a 50$ bill, you will be notified
- “Delivery radius”: Indicate the area you deliver from your store address, in km
- “Delivery time”: The average time of delivery, between the order and the start of the delivery, in minutes
- “Minimum order”: Set the minimum price for a delivery
Then add your payment options. If you choose Paypal, you’ll need to do some mandatory operations in your Paypal account, click here to see how you have to set up your Paypal account to enable it in your app. You can also pay by credit card when you pick up your order / upon delivery or you can directly pay by credit card online. To do that you just have to select the option “credit card (online payment)” and fill out the two sections “Secret Key” and “Publishable key” you obtained on Stripe. If you don’t know these keys, just check out this page to know how to get them.

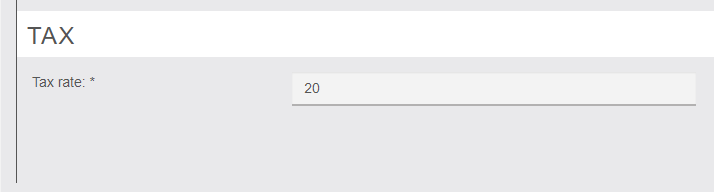
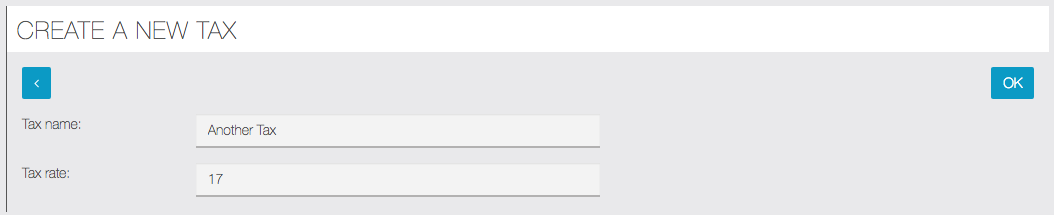
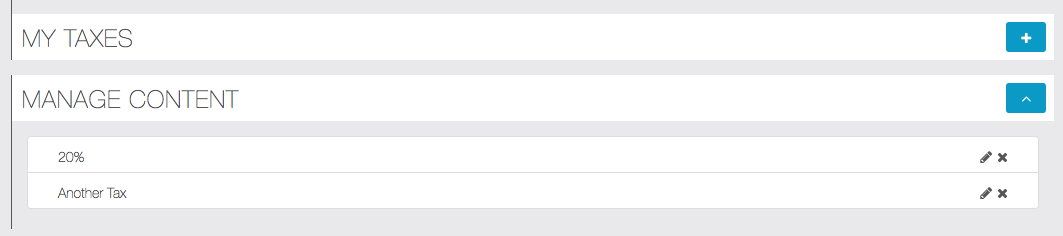
Then, create a Tax for your Store:
Save by clicking on ![]()
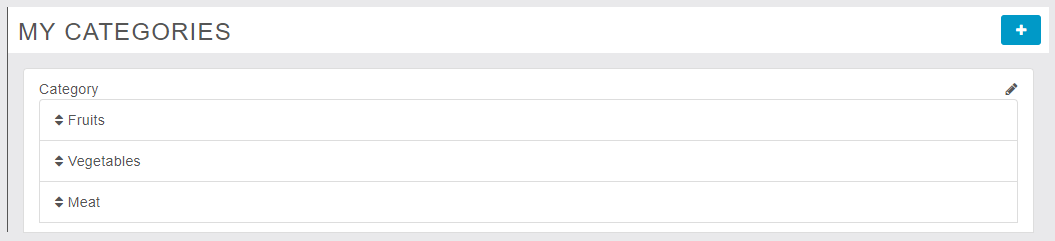
Go to “Catalog” and click on “My categories“:

Click on ![]() to add your categories:
to add your categories:

A first one is automatically created but won’t be shown to users. It’s your root category but once again it will not be shown to users so you can leave it like that. Select it and click on “+” to add a subcategory (in fact, as the root category is not shown, this new category will be a main category). Add as many categories and subcategories as you need:
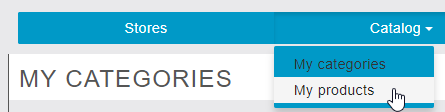
Click on “My products” from the main menu in “Catalog”:
Click on ![]() to add a product:
to add a product:
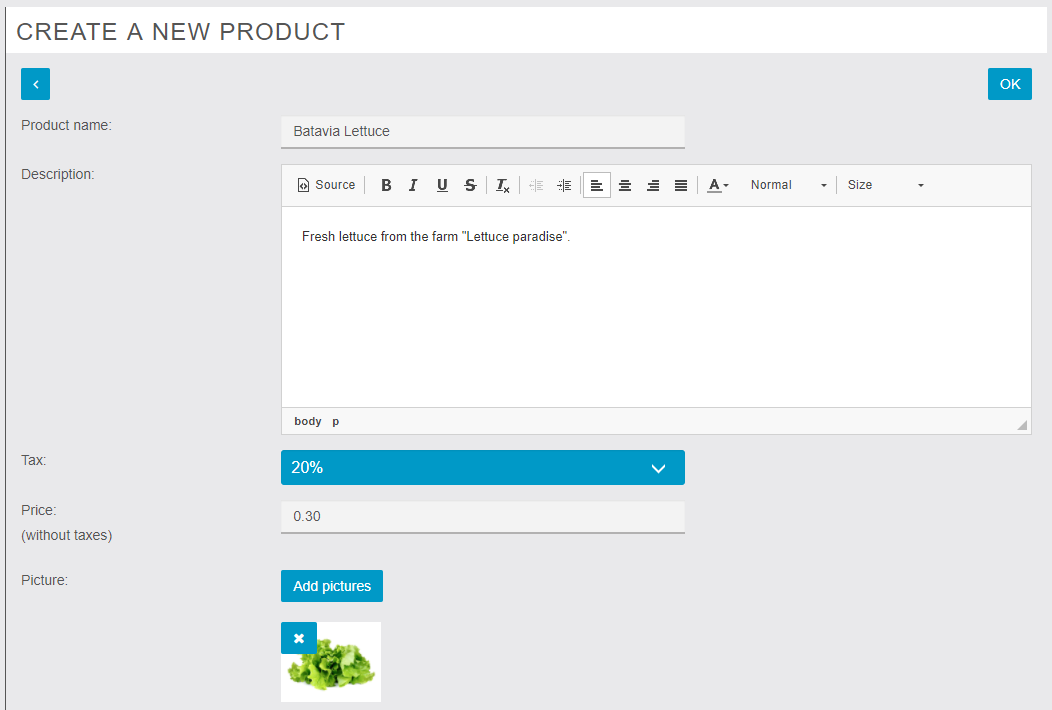
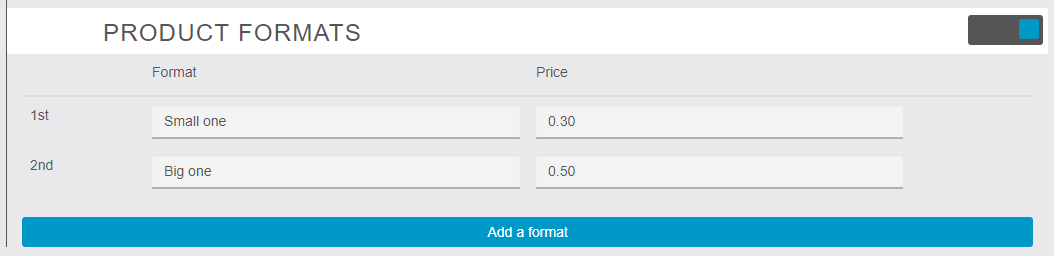
You can add some sizes/variants to your product. Switch on Product Formats and then fill out sizes/variants information of your product, with a price for each. Note that if you activate this function, you won’t be able to change the price of your product in the main menu as you did just before. The price displayed in the app will be the smallest one (“from 0.30€” for example).
You can also add some options to this product. By options we mean sauces, complementary products, etc.
First, create a new options group:
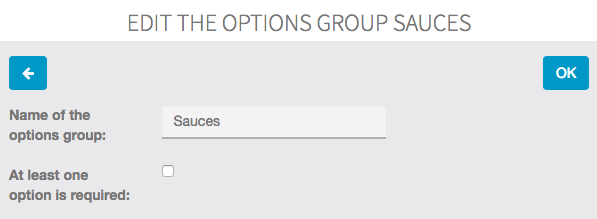
If you check “at least one option is required” the user will have to choose from the sauces you offer when he orders the product. He will not be able to order without choosing one of these options (that’s useful when you have many sizes for a product, as we will see next).
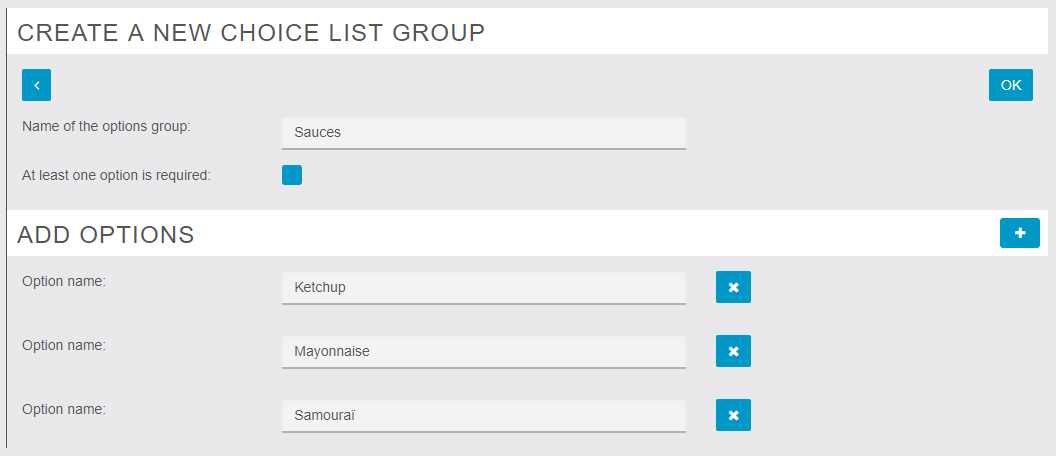
Don’t click on ![]() yet, click on
yet, click on ![]() next to “Add options” and add the name of the options you want.
next to “Add options” and add the name of the options you want.
Click on ![]() to save.
to save.
Now, in your product details page you can see your options below:

You can also choose to create an option list, for example you are selling sandwiches, and you want your clients to pick one sauce from a list:

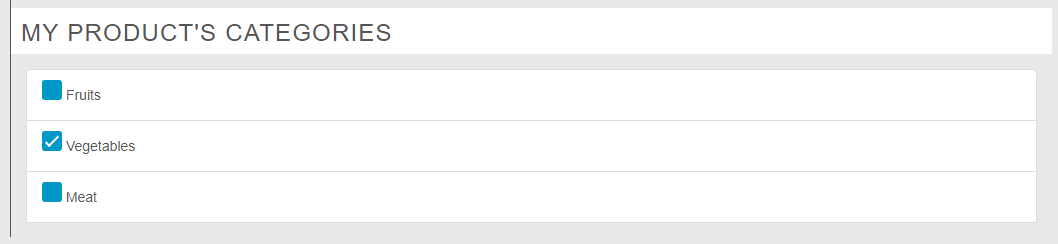
Then check the categories for your product:
And click on ![]() at the top of the page to save your product.
at the top of the page to save your product.
You can also duplicate a product if you want to create a new product that doesn’t have many differences from another one:

If you have many products in the feature, it can be difficult to scroll to find the one you are looking for. That’s why we implemented a search bar, where you can type its name and find it easily.

In the “Orders” menu, you will be able to see and manage the orders you receive.
In the “Settings” menu, you will able to manage the fields required during the order. You can either choose to make a field mandatory, optional, or simply hide it from the form. Let’s look at an example:
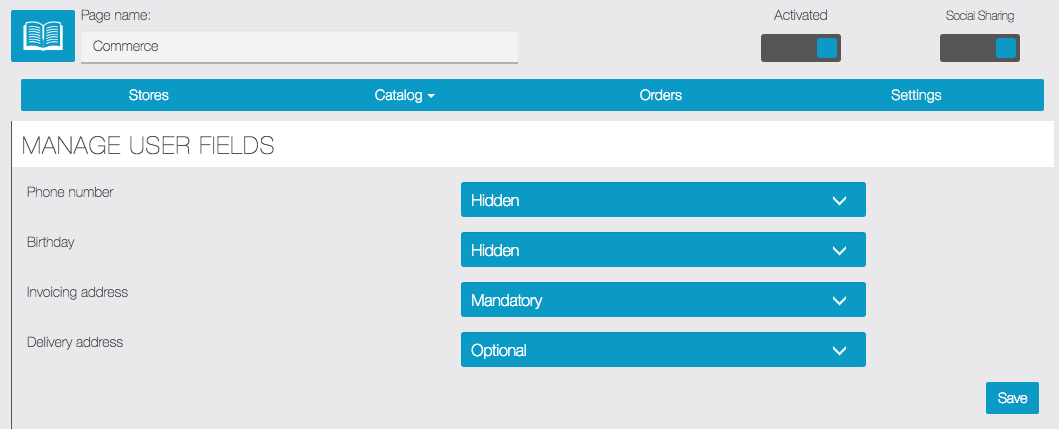
And let’s see the result inside the app when ordering:
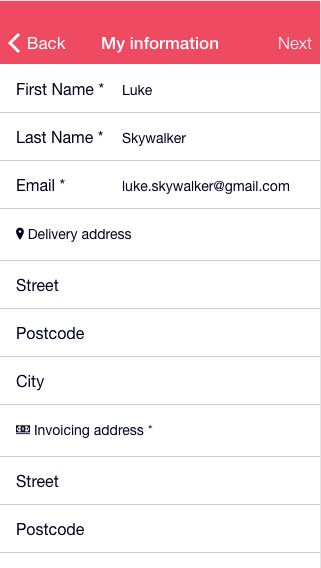
Furthermore, if the user has already created an account in the app and is logged in, some information will automatically be retrieved by the MCommerce feature to fill parts of the form, as you can see in the example above.
Then, you will be able to create discounts:
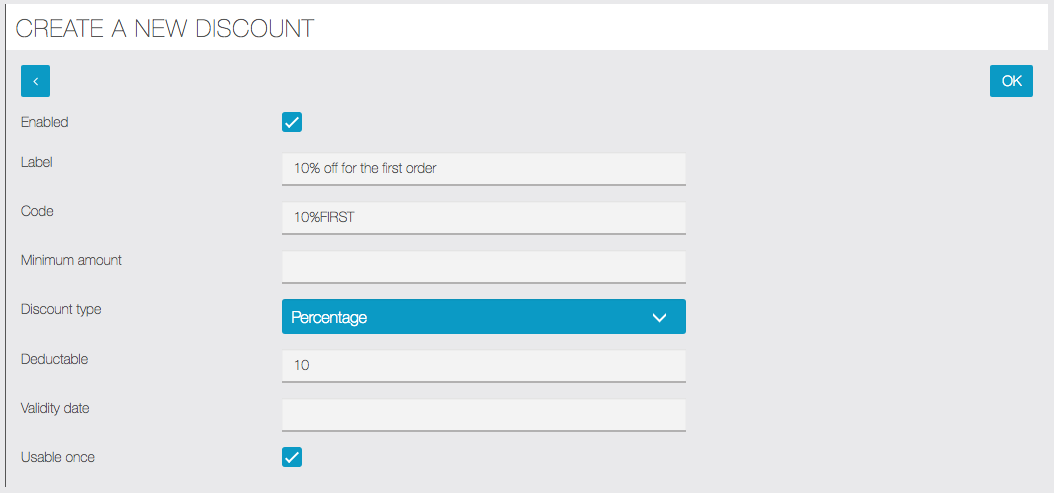
- “Enabled“: You can enable it right away or disable it for now. You will be able to enable it whenever you want after the creation
- “Label“: It’s the name of the Discount
- “Code“: Your client will use this code to activate the Discount
- “Minimum amount“: Set a minimum amount on the checkout to activate the discount. Leave it blank if there is no minimum amount
- “Discount type“: “Fixed” for fixed discount, for example 10€, “Percentage” if you want to deduct a percentage
- “Deductable“: It’s the amount you want to deduct, in your currency if you chose “fixed“, in percentage if you chose “percentage“
- “Validity date“: Fix a validity date if you want one, leave blank if not
- “Usable once“: Check this if you want your Discount to be used only once
You can then manage them in the “Manage Discounts” tab:

You will also be able to link, for each store, a Connected printer to your app to print orders when they arrive. Make sure your printer is compatible, it will need an email address:

You can also setup more taxes if your products don’t use the same taxes:
I can’t add a product to the cart:
– You have not created a category (other than the root one)
– or you have not associated the product to a category
– or you have not associated the product to a tax.