There are three steps in a migration process:
- Export/Import the database
- Move the files
- Update the configuration files
- Set up the cron
Here you have two solutions:
1. Via PHPMyAdmin
Note: If the version of PHPMyAdmin on your new server doesn’t match the one on your old server, you will have to do the export/import via SSH (part 2).
Open your PHPMyAdmin on the old server:

Click on “Export“: leave that page with default settings, and click on “Go” at the bottom.
Now go to the PHPMyAdmin of the new server, create the database (it’s best to keep the name and the password) and click on “Import“:
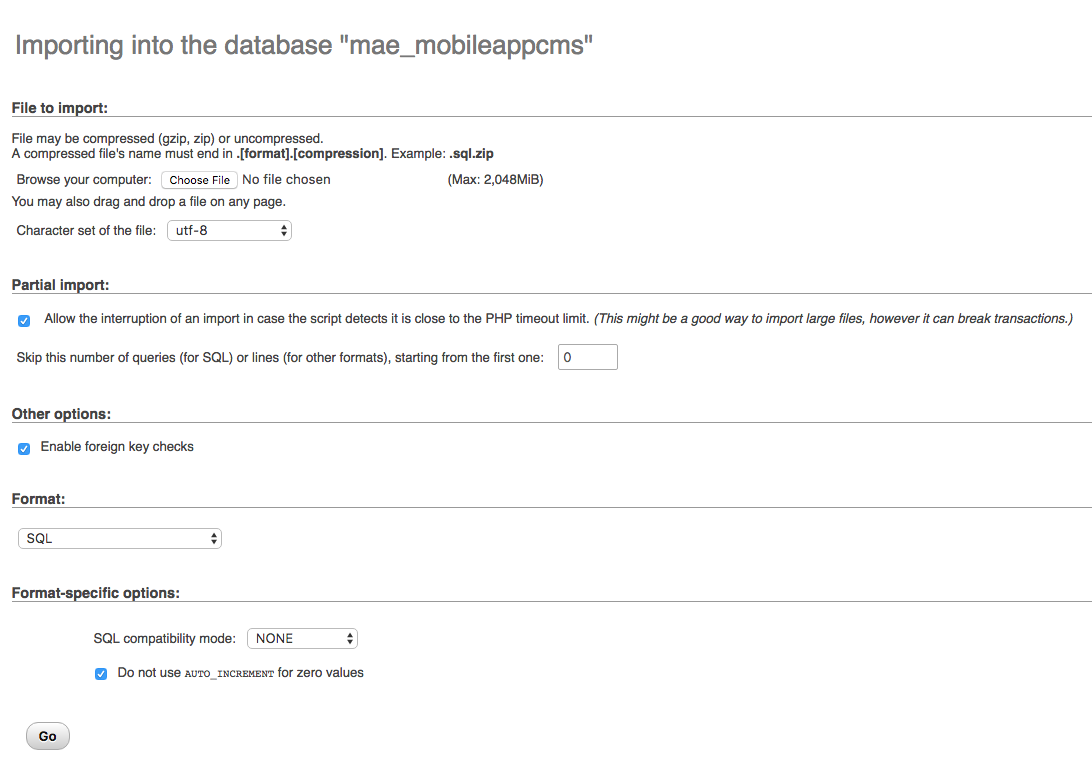
Click on “Choose File” and pick the .sql created on the old server. Then click on “Go“. It’s done !
2. Via SSH
- Connect to your old server via SSH
- Navigate to the webspace of your Siberian
- Type:
mysqldump -u user -p dbname > dbname.sqlwhere “user” is your mysql user and “dbname” is the name of your database. - Go to the “Move the files” part to move the dbname.sql to the new server.
- Now that you are on the new server, navigate to the webspace of your Siberian
- Create your database, type:
mysql -p(the password is usually the root password)create database dbname;Replace “dbname” by your database namecreate user 'user'@'localhost' identified by 'password';Replace ‘user’ by your MySQL user and ‘password’ by your password.grant all privileges on dbname.* to 'user'@'localhost' identified by 'password';Replace “dbname” by your database name, “user” by your Mysql user and “password” by your password.flush privileges;exit;
- Now type:
mysql -u user -p dbname < dbname.sqlwhere “user” is your mysql user and “dbname” is the name of your database. Enter your password when prompted and That’s it !
Here you have two solutions:
1. Via the File Manager of your Hosting Panel:
For example here, on Plesk, open the File Manager, move to the Root directory of your Siberian on your old server. Select “httpdocs” (the folder that contains your webspace) and archive it:
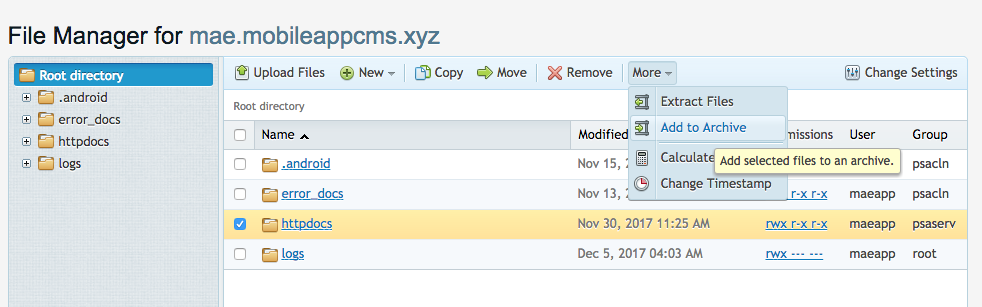
Then download it. Connect to the File Manager on your new server, at the Root directory of your new webspace, upload the archive you just downloaded, and extract it. That’s it.
2. Via SSH
- Connect to your old server via SSH
- Navigate to the webspace of your Siberian
- Type:
cd ../ tar -zcf webspace.tar.gz webspace/replace webspace by the name of the folder which contains your Siberianrsync -a webspace.tar.gz root@xx.xx.xx.xx//PATH/TO/SIBERIAN/WEBSPACE/replace xx.xx.xx.xx by the IP of your new server.- Connect to your new server via SSH
- Navigate to the webspace of your Siberian
- Type:
mv webspace.tar.gz ../ cd ../tar -zxf webspace.tar.gz
That’s it !
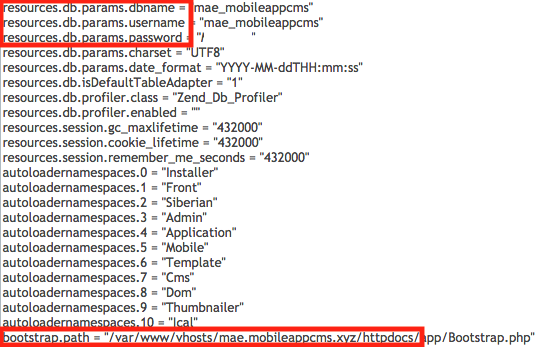
Edit app.ini in the folder app/configs/ via SSH or with your File Manager. In this file, change:
- The info of your previous database by the new ones (database name, username and password) if they have changed
- The installation path in this app.ini file at line “bootstrap.path =” (the new path from the root of your new server to the location of your Siberian)
If you have the socketio module, you will have to edit some path in the database, please contact us about this.
And then, set up the cron: how to set up the Cron scheduler.