First you need to create an app build (see how to compile your iOS app here) or use our iOS Auto-publish service.
Note: because of Apple Guideline 4.2.6, if you publish an app for a client, you must publish the app with the Apple developer account of your client.
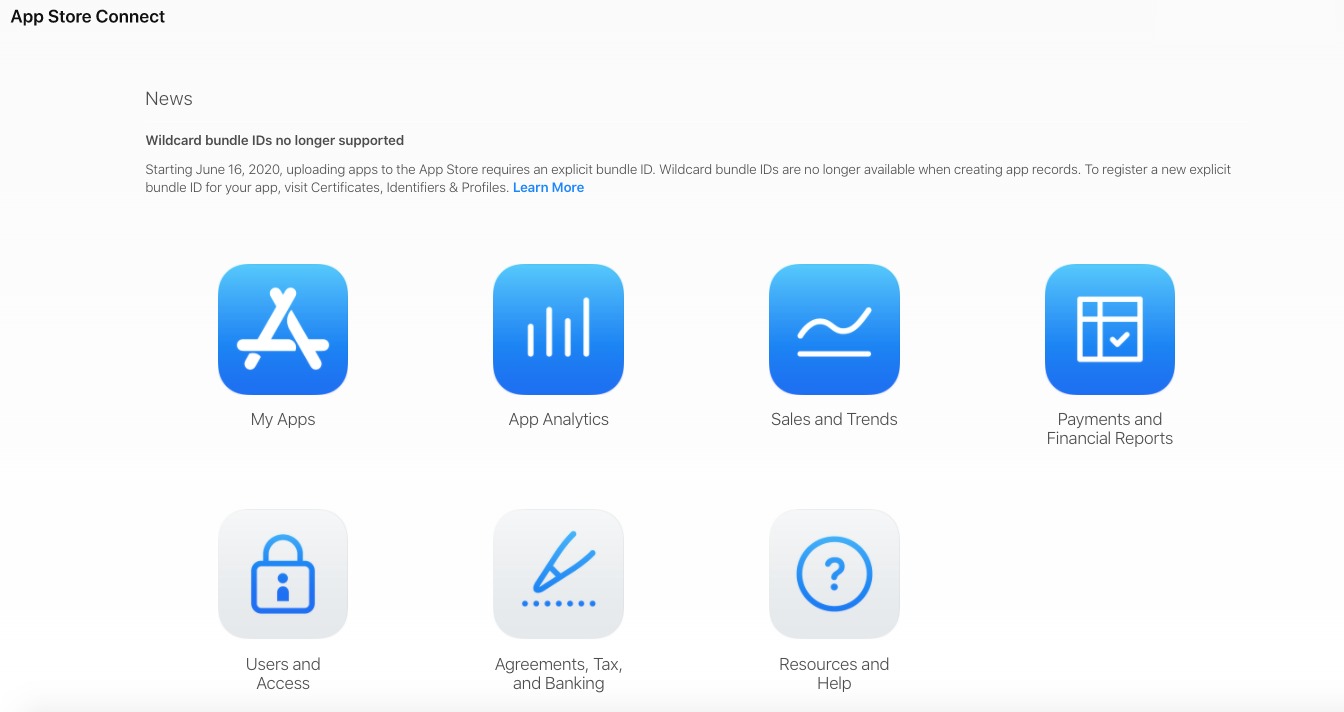
Once your app build is created, sign in to your App Store Connect account on https://appstoreconnect.apple.
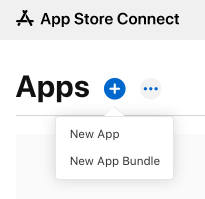
1. Click My Apps.
2. Click + and select New App.
3. Complete the following:
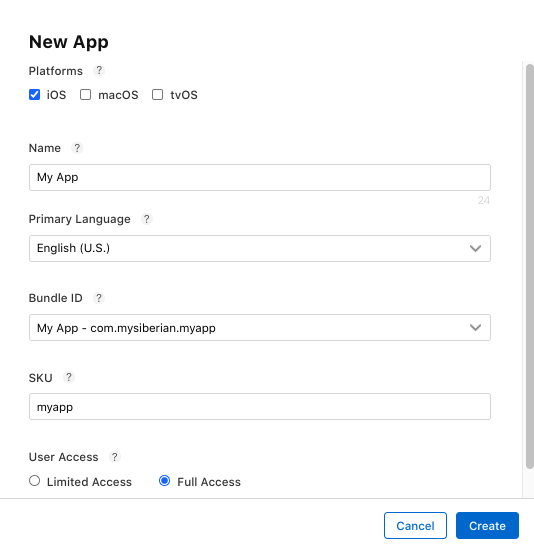
Note: The bundle ID is the unique identifier you have used to create your app build.
The SKU Number is a unique ID for your app, it will not be seen by the users. You don’t have to perform these steps (1 to 3 ) if you have purchased our publication service, but just to start from these steps:
4. In iOS App > Prepare for submission tab: in Version Information, first add the screenshots of your app.
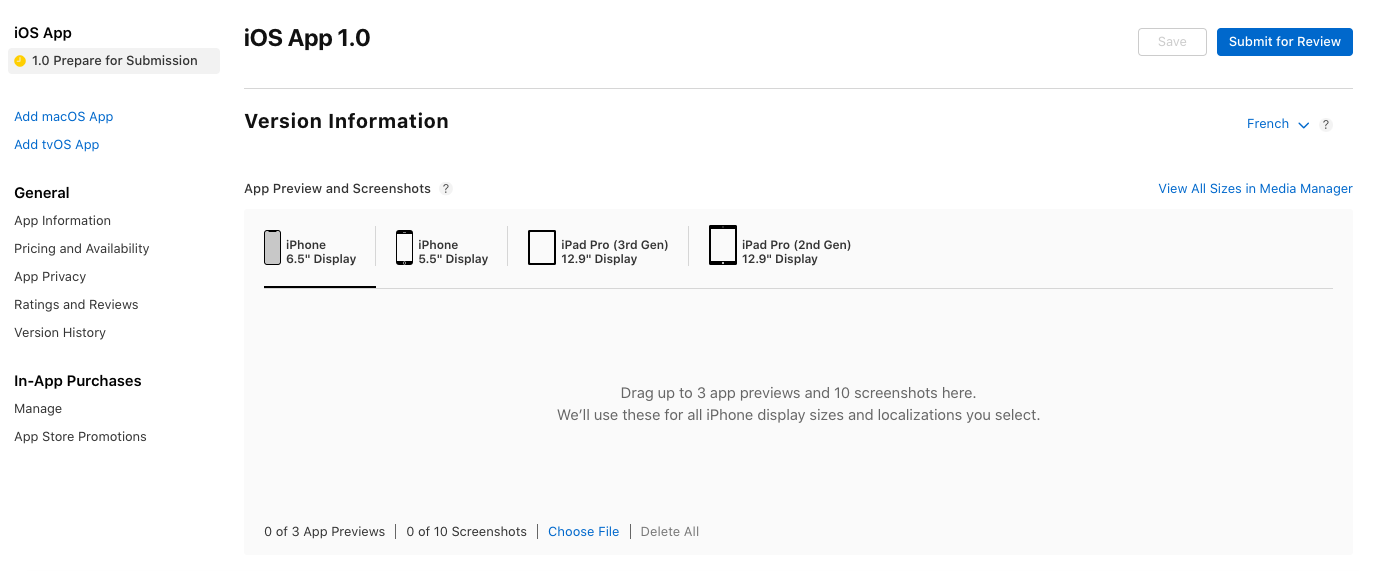
Choose the device type and drag your images for each format.
iPhone: 6.5-inch display (iPhone 11 Pro Max, iPhone 11, iPhone XS Max, iPhone XR): 1242 x 2688 pixels (portrait).
iPhone: 5.5-inch display (iPhone 6s Plus, iPhone 7 Plus, iPhone 8 Plus): 1242 x 2208 pixels (portrait).
iPad: 12.9 inch display (3rd generation iPad Pro): 2048 x 2732 pixels (portrait).
iPad: 12.9-inch display (2nd generation iPad Pro): 2048 x 2732 pixels (portrait).
5. Enter the following information for your app:
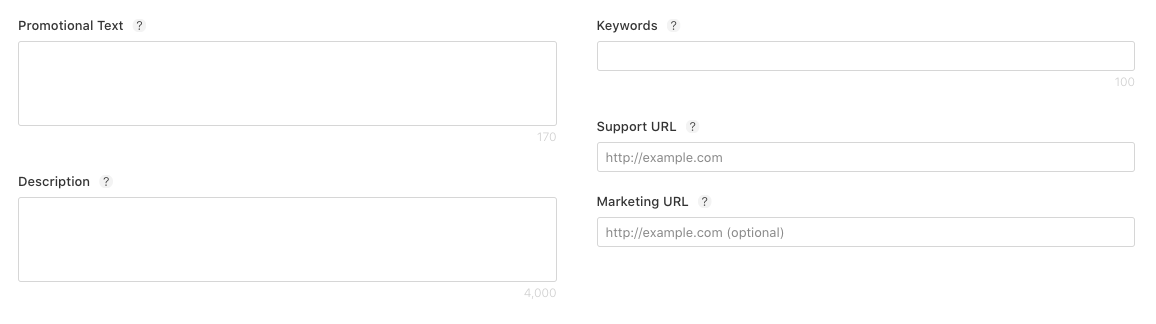
– Promotional Text (optional): Promotional text lets you inform your App Store visitors of any current app features without requiring an updated submission. This text will appear above your description on the App Store for customers with devices running iOS 11 or later.
– Description: must be 300 characters minimum, explaining to the user what he will find in your app
– Keywords: 5 at least, 10 maximum
– Support URL: it appears on your app sheet, to provide some support to users if needed
– Marketing URL (optional): a link where users can find more information about the app.
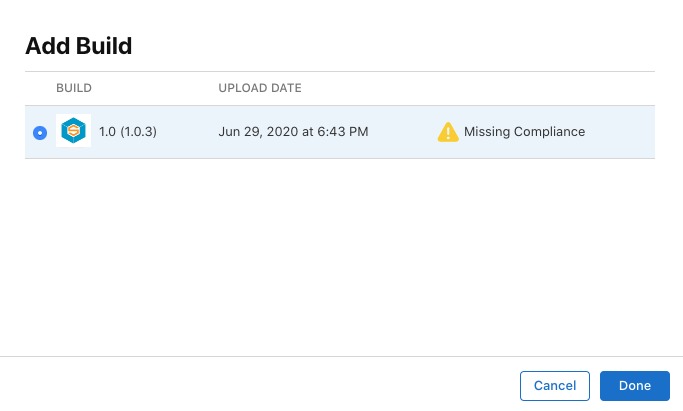
6. Click + next to Build in order to add the Build of your app.

The + is only available after your compiled app has been uploaded to your App Store Connect account from Xcode or from the iOS Auto-publish service.
7. Select your build and click Done.
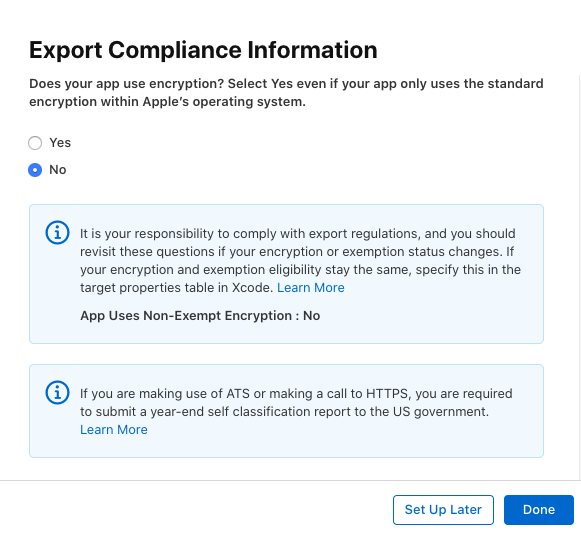
For Export Compliance Information, select No and click on Done.
8. In General App Information
– Edit the Rating of your app and select how often each content description appears in your app.
– Enter the Copyright: The person or entity that owns the exclusive rights to your app, preceded by the year the rights were obtained (for example, “2020 Siberian CMS”).
– (Optional) Routing App Coverage File. Specify the geographic regions supported by your app. The file must be in the .geojson format.

9. In App Review Information, enter your contact info where Apple can contact you with issues regarding the review process.
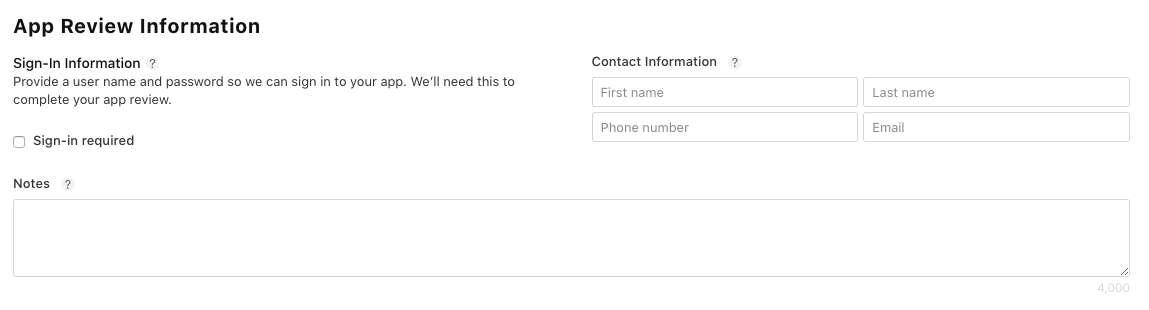
This information is not visible to your app users.
If some parts of your app are locked and not available for all users, you have to provide a demo Account authorized to access the entire app by checking “Sign-in required“.
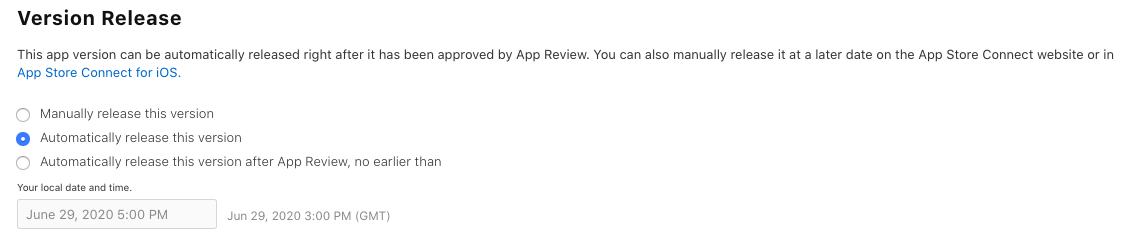
10. In Version Release, select Automatically release this version.
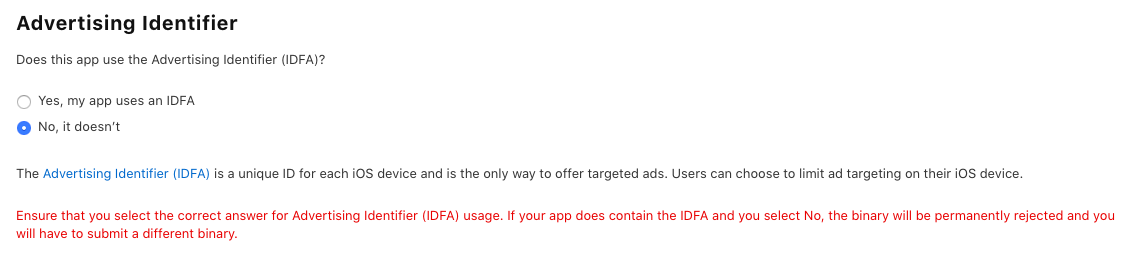
11. In Advertising Identifier, select No if you have not added AdMob ads in your app.
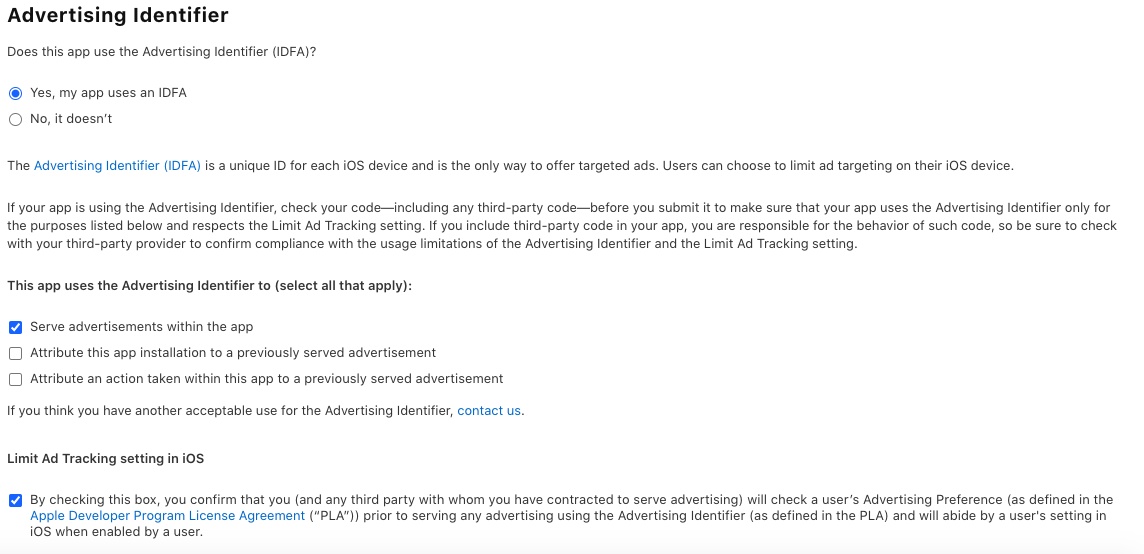
Otherwise, if you have added AdMob ads, select Yes and select the following.
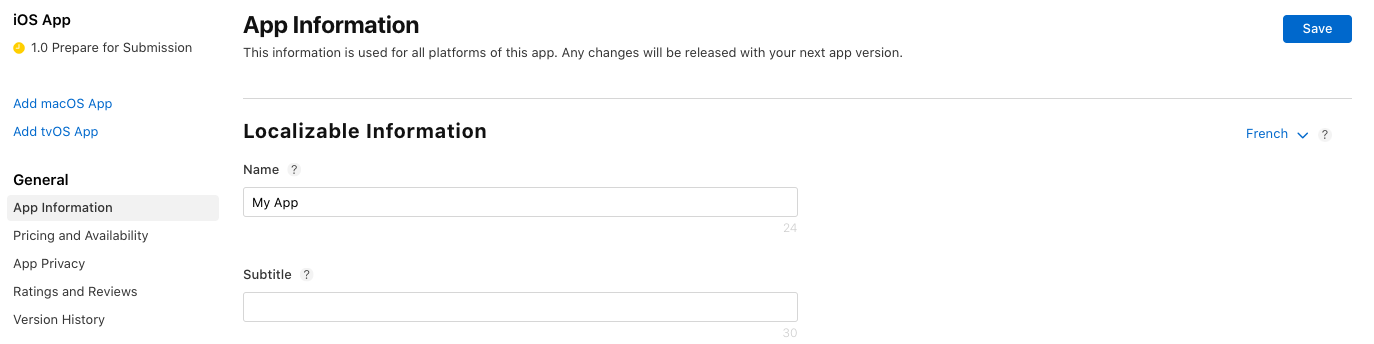
12. In General > App Information tab: in Localizable Information, you can edit the name of your app and add a subtitle:
Then, in General Information, select the category of your app, you can also select a secondary category (optional):
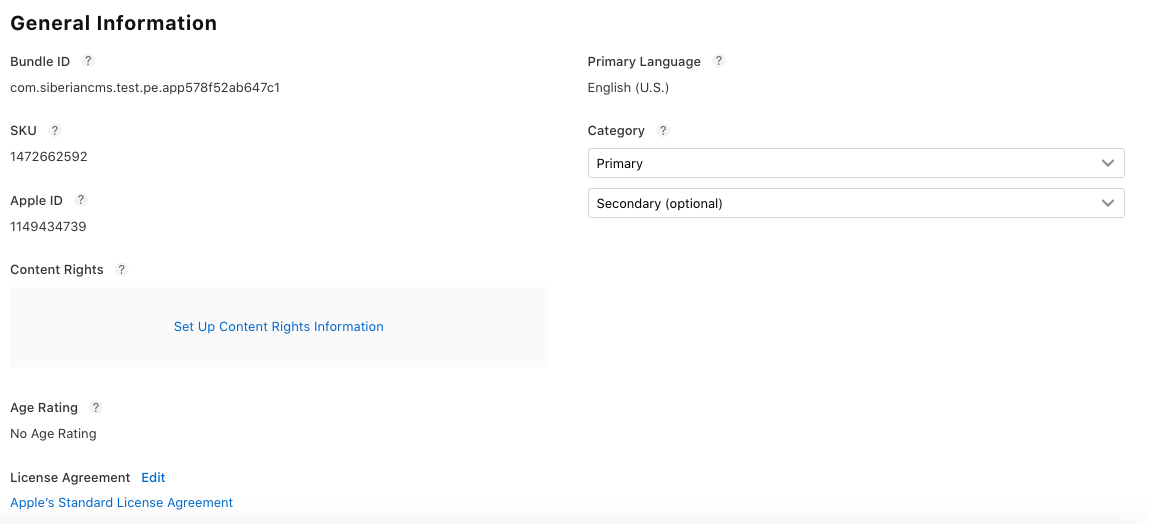
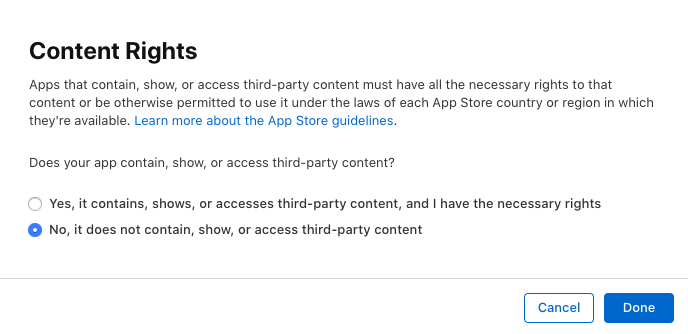
For Content Rights, click on “Set Up Content Rights Information“, select No and click on Done:
13. Click the Pricing and Availability tab.
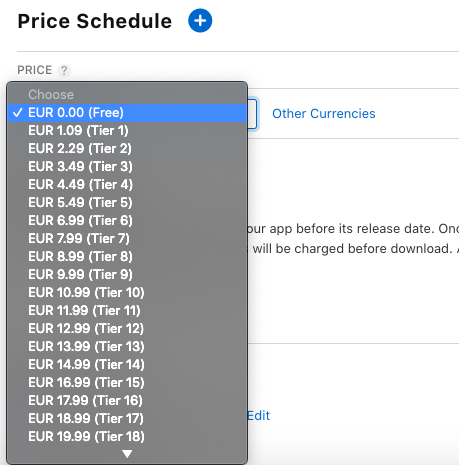
14. In Price Schedule, select the Price of your app.
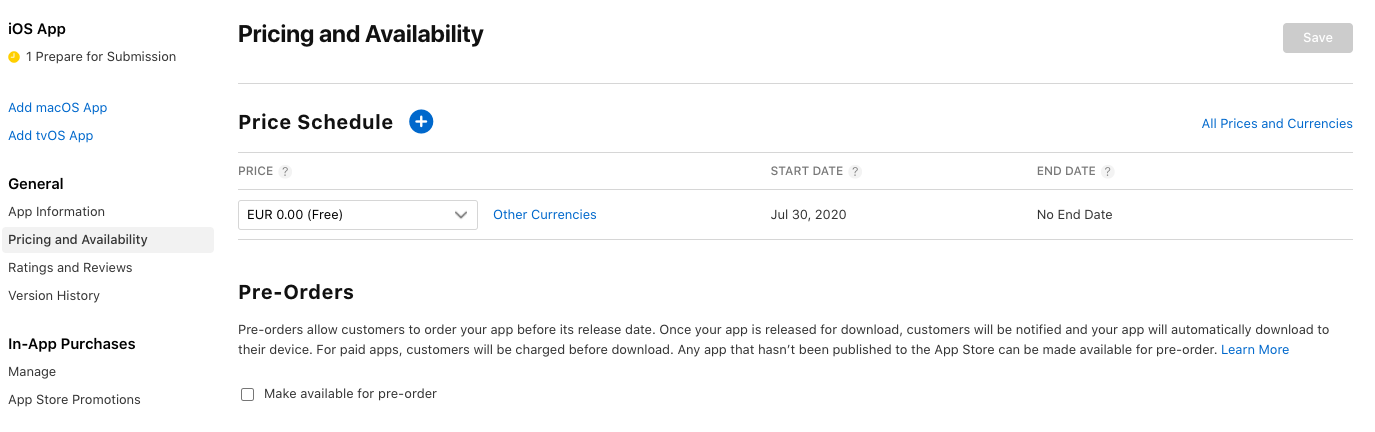
This determines the App Store price and your proceeds. If your app is free, choose Free.
If you want to sell your app, you must have a Paid Application Agreement.
Pre-orders allow customers to order your app before its release date.
If you check “Make available for pre-order“, your app must be manually released as a pre-order after it’s approved by App Review.
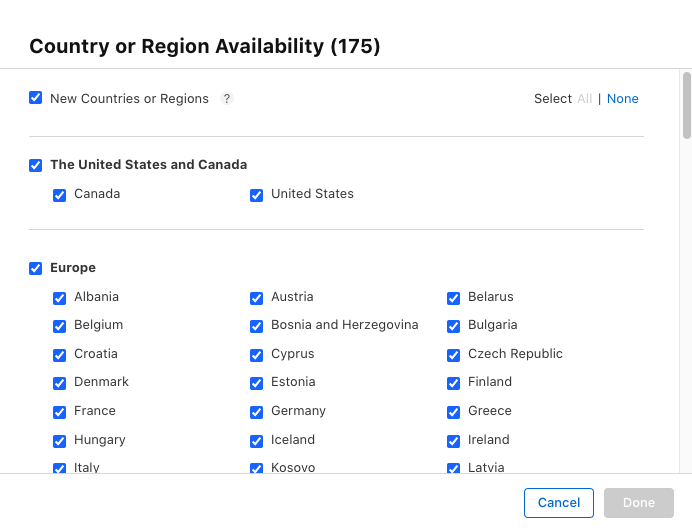
15. In Availability, by default all territories are selected, but you can select the countries where your app will be available.

16. Click Save.
17. Click the App Privacy tab.
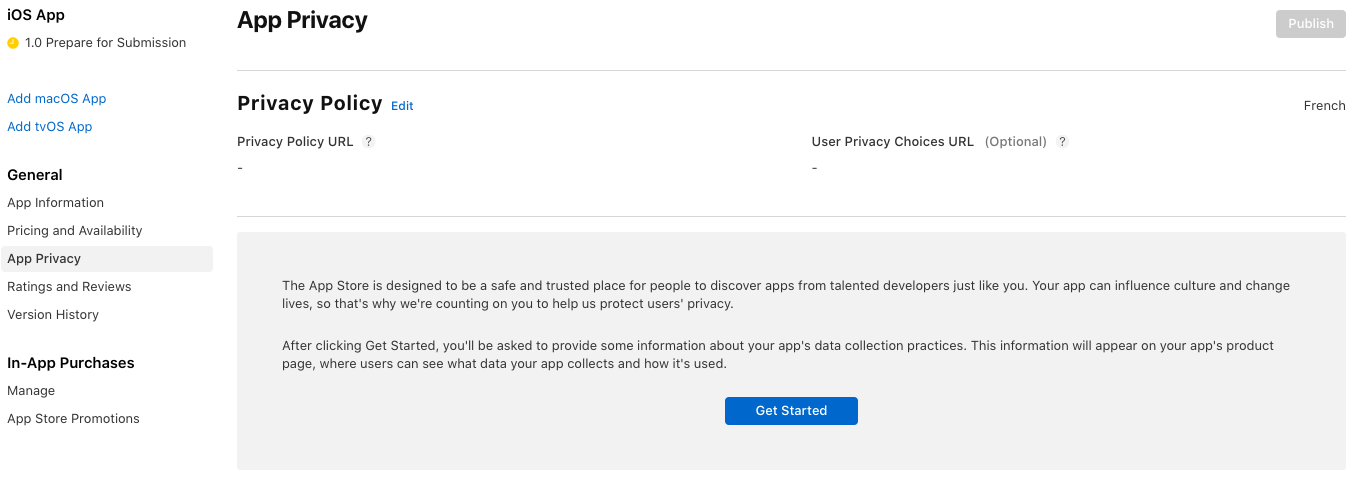
Click on Edit next to Privacy Policy and enter the Privacy policy URL of your app In Privacy Policy URL:
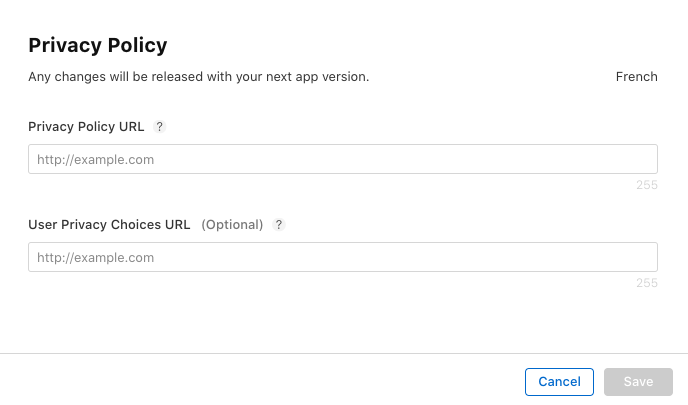
Click on Save.
Then click on Get Started to provide some information about your app’s data collection practices.
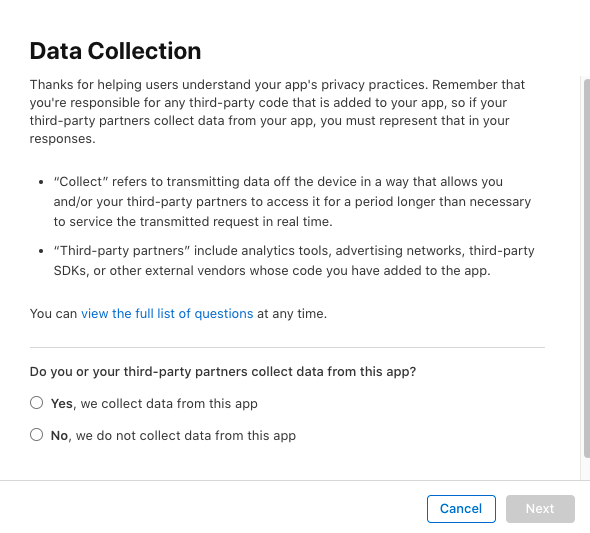
Once you have completed the questionnaire, click on “Publish“.

18. Return to the Prepare for Submission tab.
19. Click Submit for Review.

Voila! Your app is submitted to the App Store.
(The status of your app is now Waiting for Review and it will be available on the App Store within few days.)